 Start playing
agents · 12
after the white rabbit: an Unlock! adventure from tabletop to 3D
A browser adventure inspired by Unlock!, built with Codex, Blender and Three.js. How we adapted the puzzles and fixed the models that got in their way.
I wanted a version of this game I could walk around in. Follow the rabbit through Wonderland, explore between puzzles and get close enough to inspect a clue. A room was fine when it fit the story. I just didn't want the whole thing stuck in one.
§What is Unlock!?
Unlock! is a series of cooperative escape-room card games from Space Cowboys. You play alone or with other people around a table, using a deck and a free companion app. The cards show locations, objects and clues. You look for hidden details, work out which objects belong together and solve puzzles to advance the story. The app checks codes, runs interactive puzzles and gives you hints. It also keeps time, with adventures usually designed for about an hour.
In Pursuit of the White Rabbit is one of the three adventures in Unlock! Heroic Adventures. It takes Alice through Wonderland and its strange inhabitants. That gave this project both its story and its puzzle progression. I wanted to keep the deductions, then give you a world where you could make them by looking around and handling objects.
I worked with Codex from the French solution booklet. Save that link for after playing. It contains the answers. We made original environments, models and an interface for a single-player, first-person browser game. The puzzle logic follows the tabletop adventure closely. This is an independent fan adaptation with no affiliation to Space Cowboys.
§A place between the puzzles
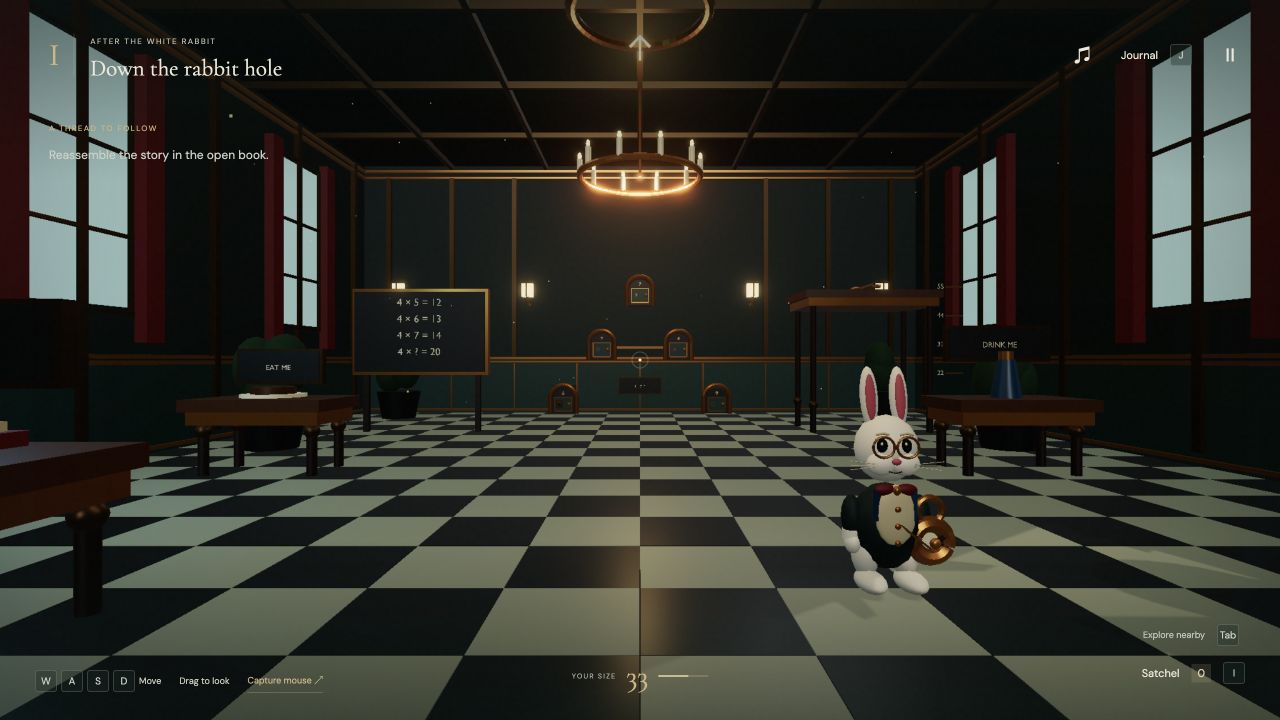
The hall stays indoors because its puzzles depend on scale. A table can be out of reach, and a door can be too small. Beyond it, you follow paths through a wooded valley to the bridges, the pepper-filled cottage and the tea clearing. The Queen's grounds have separate areas to explore before you reach the final construction.
I wanted a reason to walk somewhere. Small objects become discoverable when you get close, and some clues need a different viewing angle. The Explore menu helps you return to landmarks, while the journal records what you've found. I also wanted time to look around, so this version has no countdown or penalty for a wrong answer.
§The rabbit had to behave like a rabbit
The rabbit was one of my first complaints. Bouncing the whole model up and down wasn't enough. We made separate animations in Blender for standing idle, hopping and checking his watch. His ears move with his head, and the pocket watch stays attached to his paw. He follows a route and waits when you fall behind.
The model is stylized, but the movement still has to make sense. Getting the ears and watch to follow the right body parts took attention.
§The first fidelity pass
When we checked the puzzles against the original, some were giving too much away. An early sign diagram drew most of its own solution. The journal explained the clock puzzle before you had to make the connection. We removed those explanations and revised the clues so you have to compare the messages and clocks yourself. The sign puzzle now asks you to trace its colored arrows.
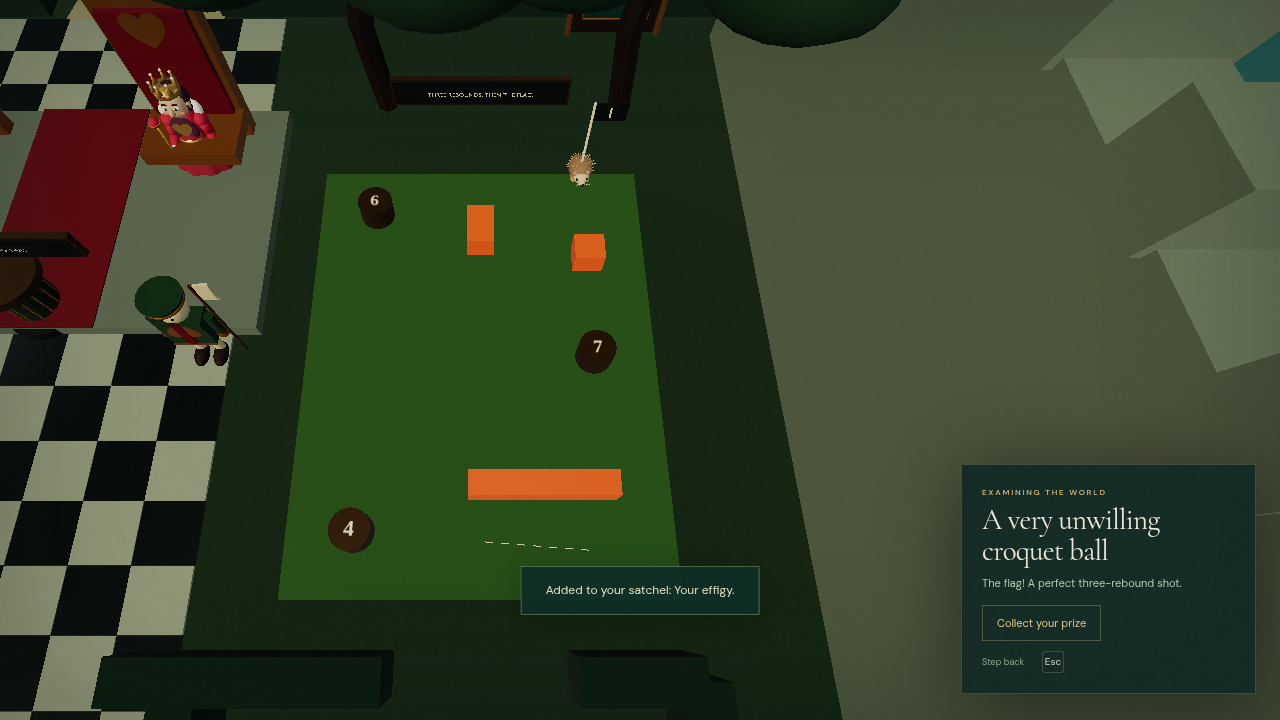
The croquet puzzle had a different problem. It accepted the intended sequence even though the hedgehog rolled through an obstacle. We changed the lawn and made the shot checks use the visible geometry. A blocked shot now stops at the obstacle.
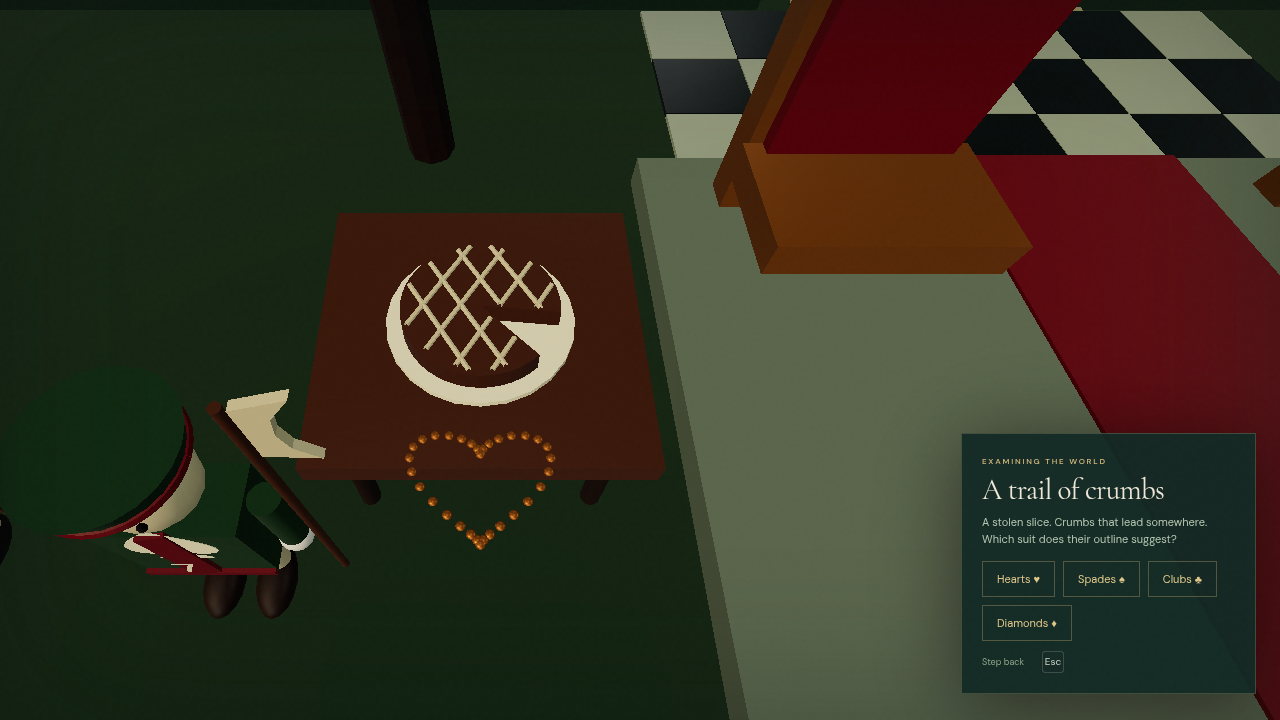
The guards were harder to model than they looked. An accidental difference between their uniforms became an extra clue, so we had to check every variation. At the tart, the pastry hid part of the crumb outline you needed to recognize. We cut the missing slice into the model and moved the crumbs into view. A sign also covered the gardeners' tunic numbers. These were small modeling mistakes that made the puzzles unfair.
For the final house, we replaced a list of selected pieces with a construction you assemble. You place each part, turn the bridges over, remove mistakes and test whether it holds. This version of the puzzle needed another pass, described in the study below.
§The first release still had bugs
We published too early. Codex reported passing checks, and I still ran into overlapping doors before leaving the opening hall. I hadn't solved the game yet. The earlier review checked answers and selected checkpoints, but missed problems in the route between them.
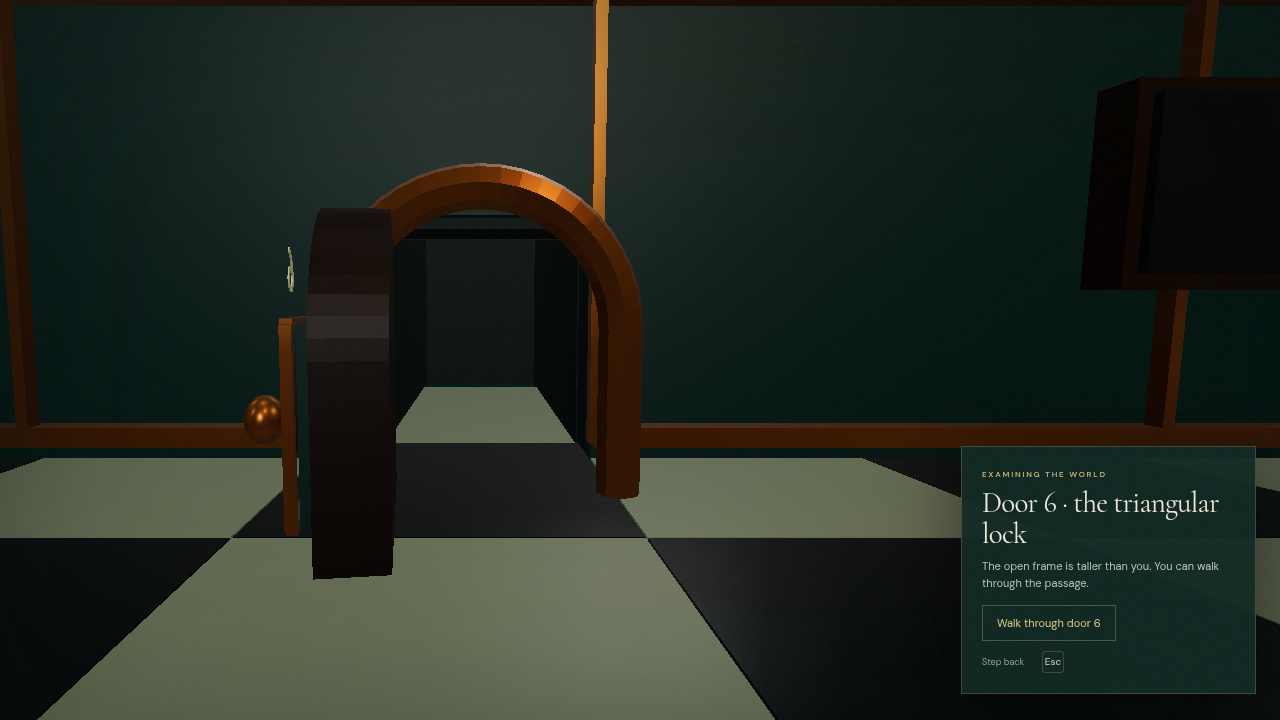
The doors made that gap obvious. Their panels overlapped, and parts of the arches looked broken. Door 6 looked big enough to walk through at a size the game refused. Its triangular lock was a tiny symbol, and a separate height condition could stop a collected key from working. Knowing the intended solution wasn't enough to tell whether I was stuck on a puzzle or a bug.
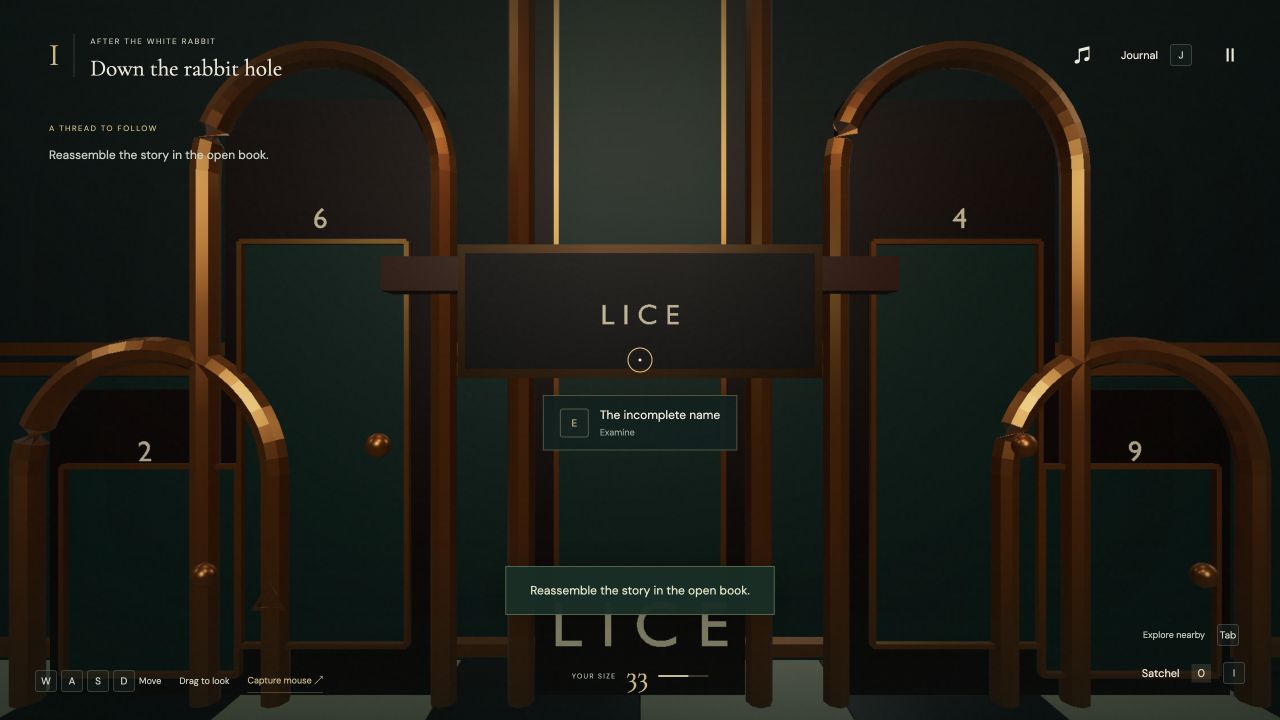
Before. This is the original published build, captured again without changing its models.
The original adventure asks Alice to shrink for this passage. The size rule was faithful, but our model gave the wrong evidence. We separated the doors and rebuilt the small opening to match the player's body. The triangular keyway is now part of a brass plate attached to the door. Once unlocked, the leaf swings open and you walk into the passage to leave the hall. The geometry and the interaction need to agree.
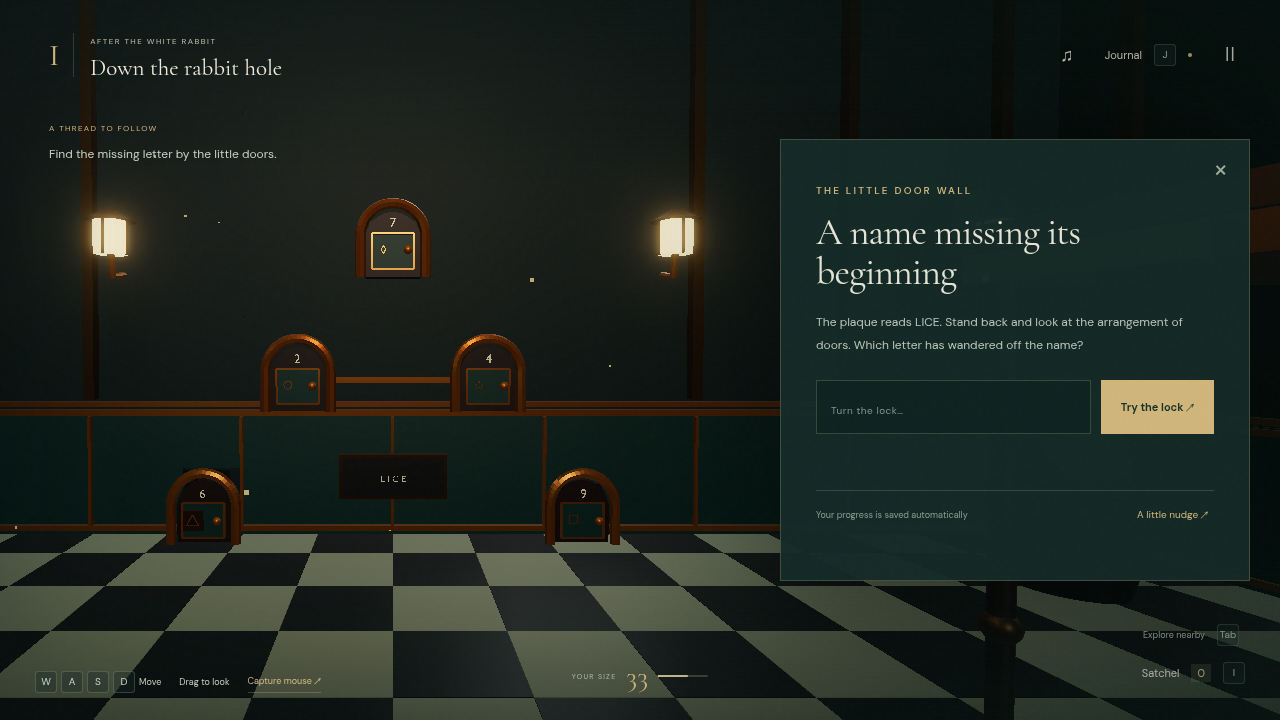
After. The opening has to explain why shrinking helps before the game asks you to do it.
§The wall gave away the answer
Then I noticed something even simpler. Door 6 had a hole behind it. Door 9 had a solid wall. I could pick the right door by looking at the unfinished geometry, without comparing the key and locks at all.
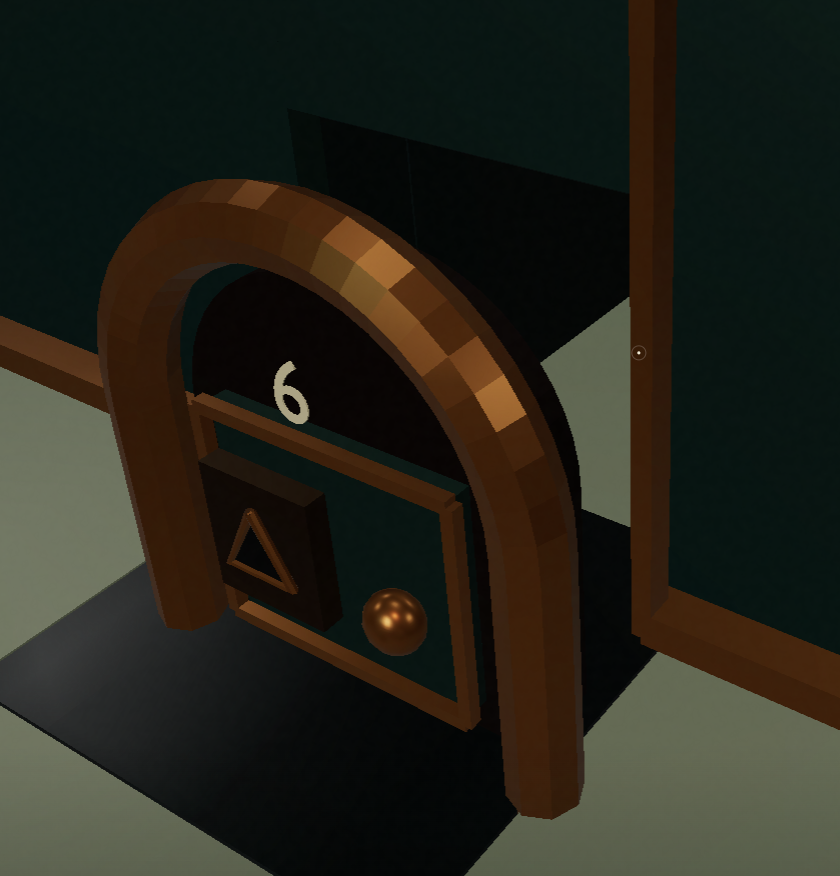
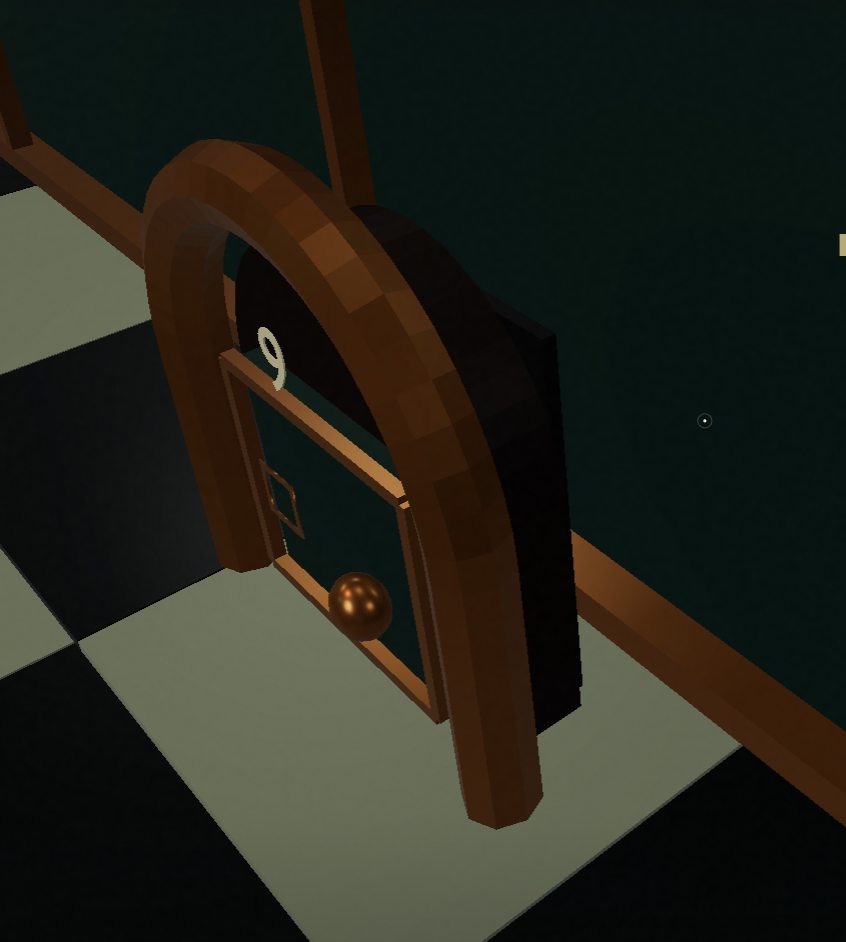
We rebuilt the casings in Blender. All five doors now have the same fitted jambs and arched interior, with solid wood covering the corners of the rectangular opening. Door 6 still opens into a passage after you unlock it.
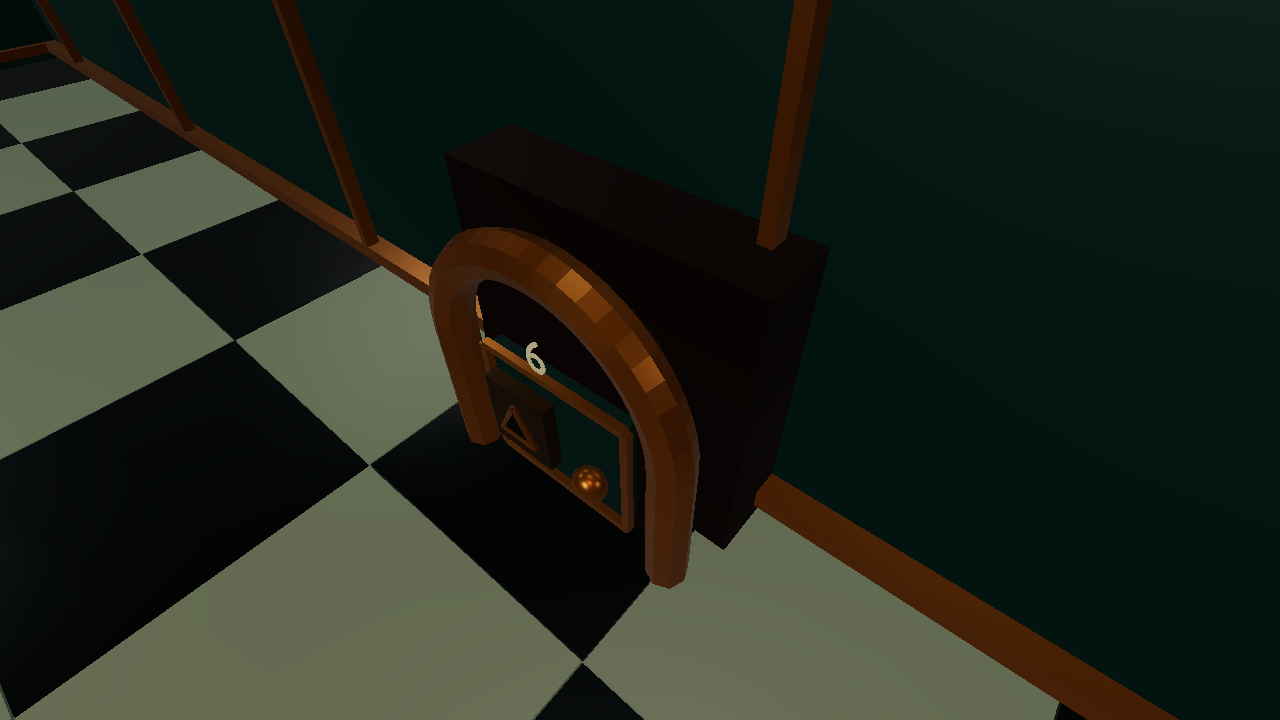
This was another accidental clue we had introduced. A correct answer check cannot catch that. We added checks from several player heights and side angles, including one through the passage after the leaf opens. The screenshots belong in the bug log too, because the first repair had left this problem behind.
The cake and bottle had another basic mistake. Both menus offered every size, so cake could shrink you and a drink could make you grow. Cake now offers larger sizes; the bottle offers smaller ones. Both stay available, so choosing the wrong size doesn't leave you stuck. This went into the bug log with the door failures and the rest of the repair pass.
§Reading and moving on a phone
The first phone layout was hard to read and use. The book had small controls and a scrollable list inside a scrollable popup. That cost space in landscape and made it easy to scroll the wrong part of the page.
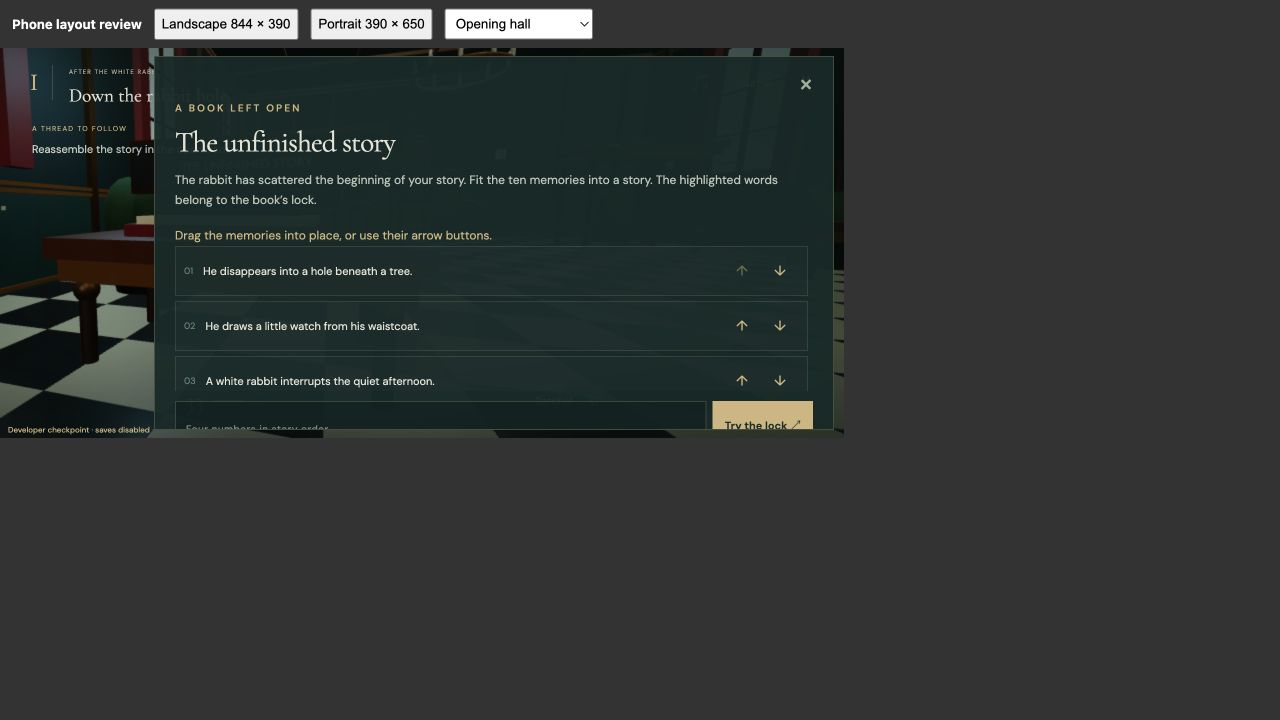
Before, in the browser's 844 by 390 phone layout.
We gave phone puzzles the full width, enlarged the buttons and removed the extra scroll region. Close stays in a pinned toolbar. A separate Look at the clue button lets you switch back to the scene without losing your place in the puzzle.
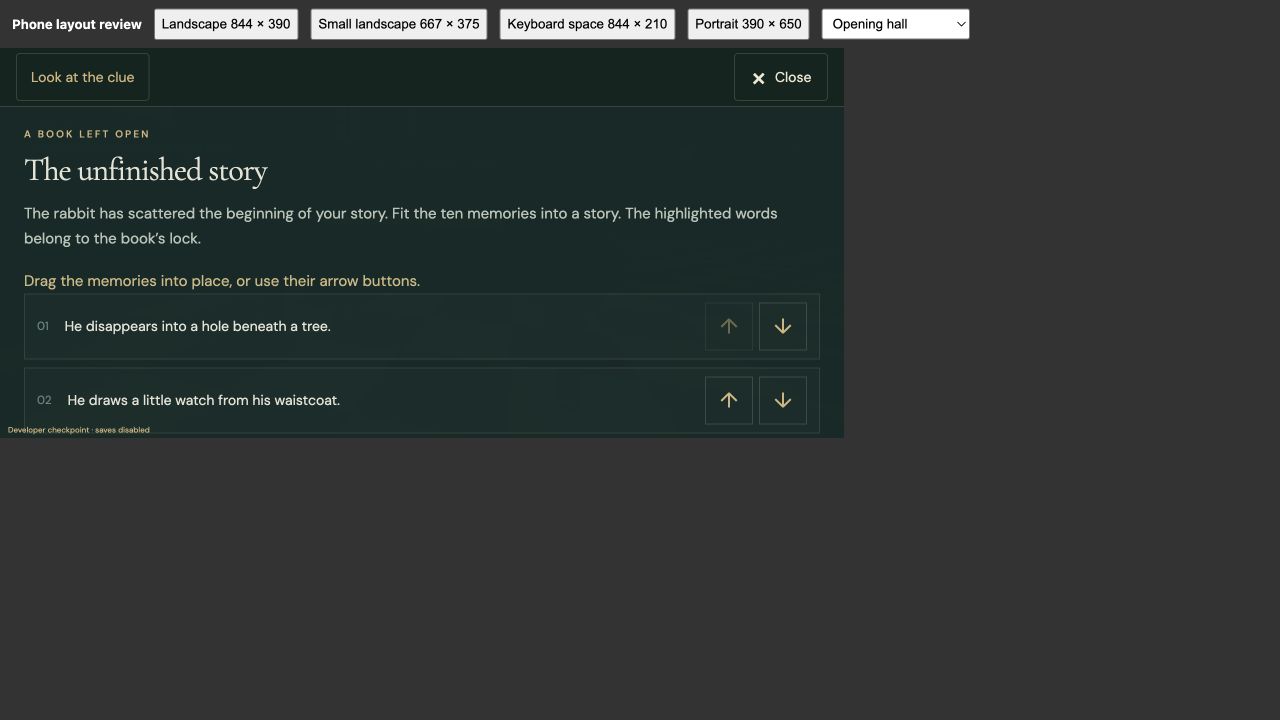
After, at the same game viewport size.
The keyboard needs room too. We added a check with the available height reduced to 210 pixels, then made the answer field and submit button reachable in that space. This is a browser layout check, not evidence from a physical phone.
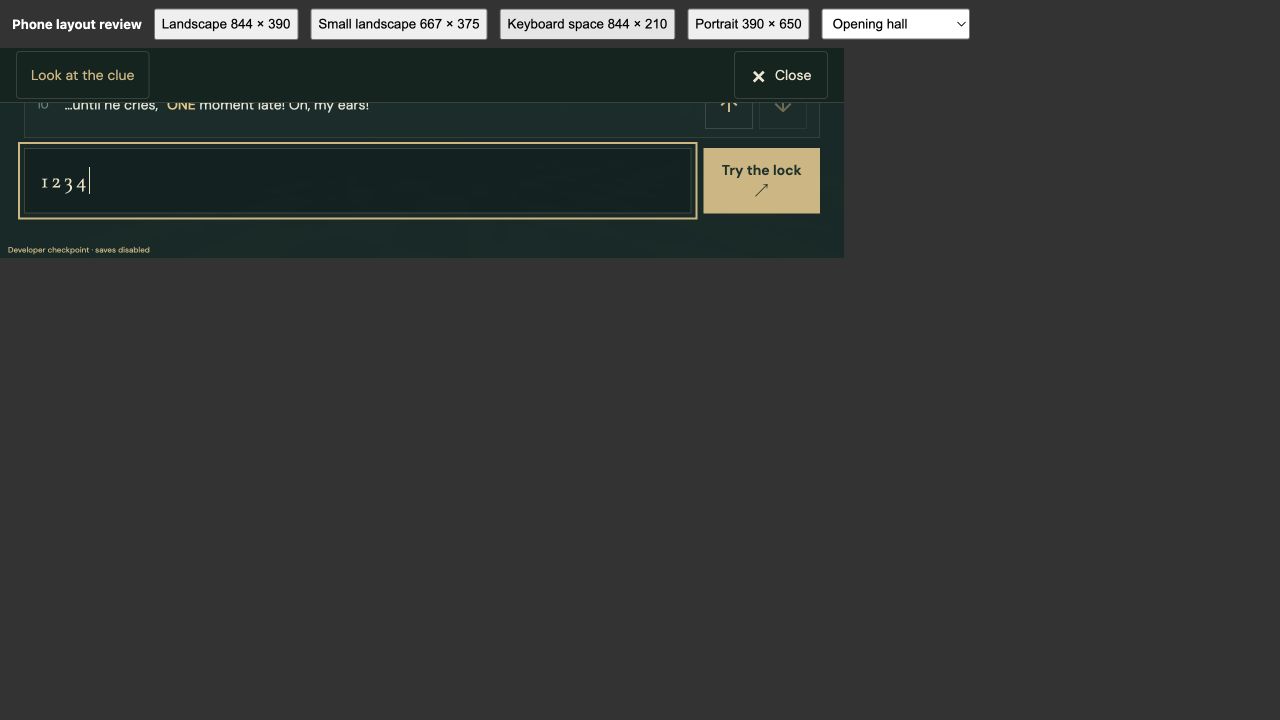
Reduced-height check with sample input. The keyboard itself is not being emulated.
Walking also felt twitchy and slow. We smoothed the joystick response, reduced look sensitivity and added a Run toggle. Small Alice still enters the second chapter because that follows the source, and the mushroom belongs to that part of the story. We removed the outdoor speed penalty. Looking small shouldn't turn the trip to the next clue into a crawl.
The residents needed another Blender pass as well. The frog and caterpillar were mostly static shapes, and the caterpillar got in the way of its appointment clock. The new characters have moving joints and facial animation. The cook's spoon stays in the cauldron, the Hatter raises his cup, and the Queen gestures while holding her scepter. We preserved the clue props and left the gardeners' numbers and guards' uniform differences alone.
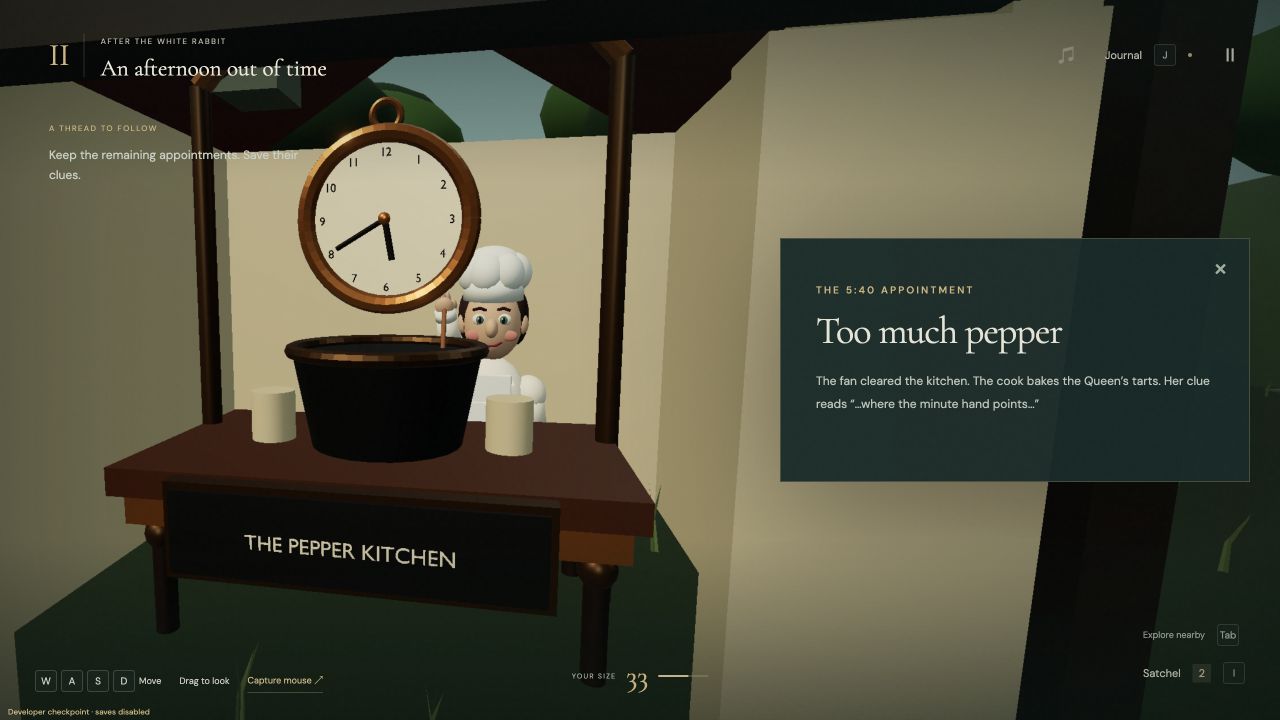
The cook was a useful lesson in checking animation inside the scene. Her new face sat behind the old kitchen sign, and her stirring hand dipped below the pot's solid top. We moved the sign onto the counter front, raised the hand and lengthened the spoon. A spare hat also hid the Hatter's face. We moved that prop to the other end of the table and kept its price tag.
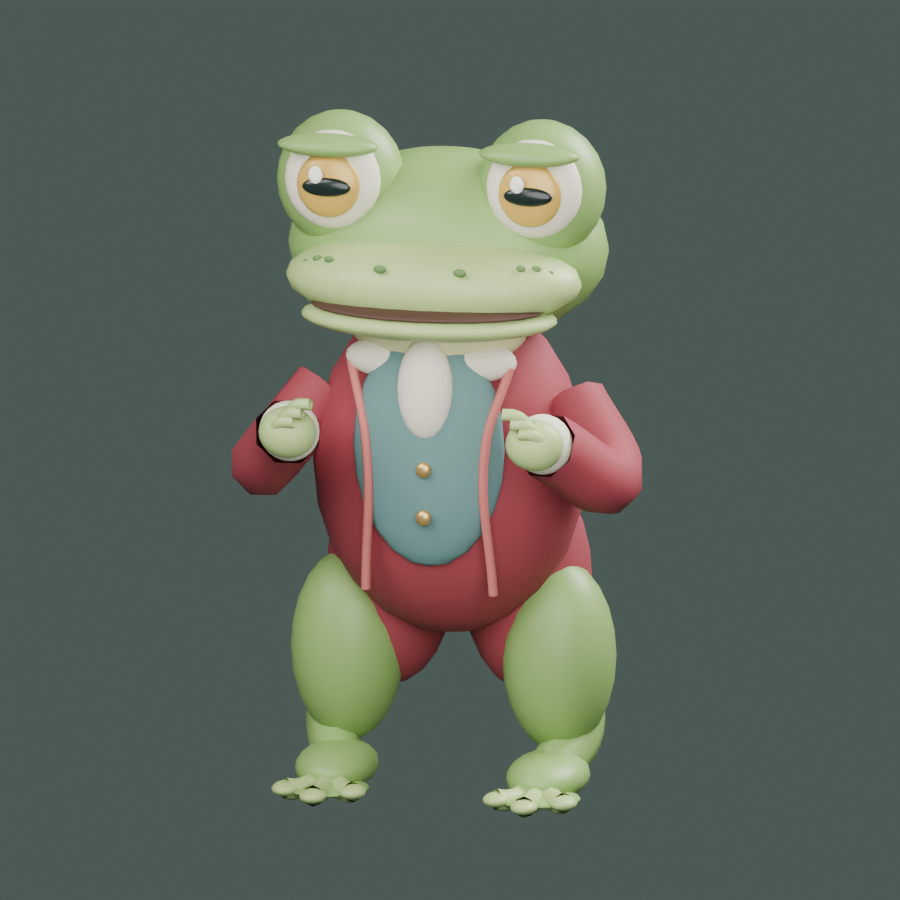
Blender model view of the revised frog. His speaking motion uses the mouth and throat; his body no longer has to bounce to suggest life.
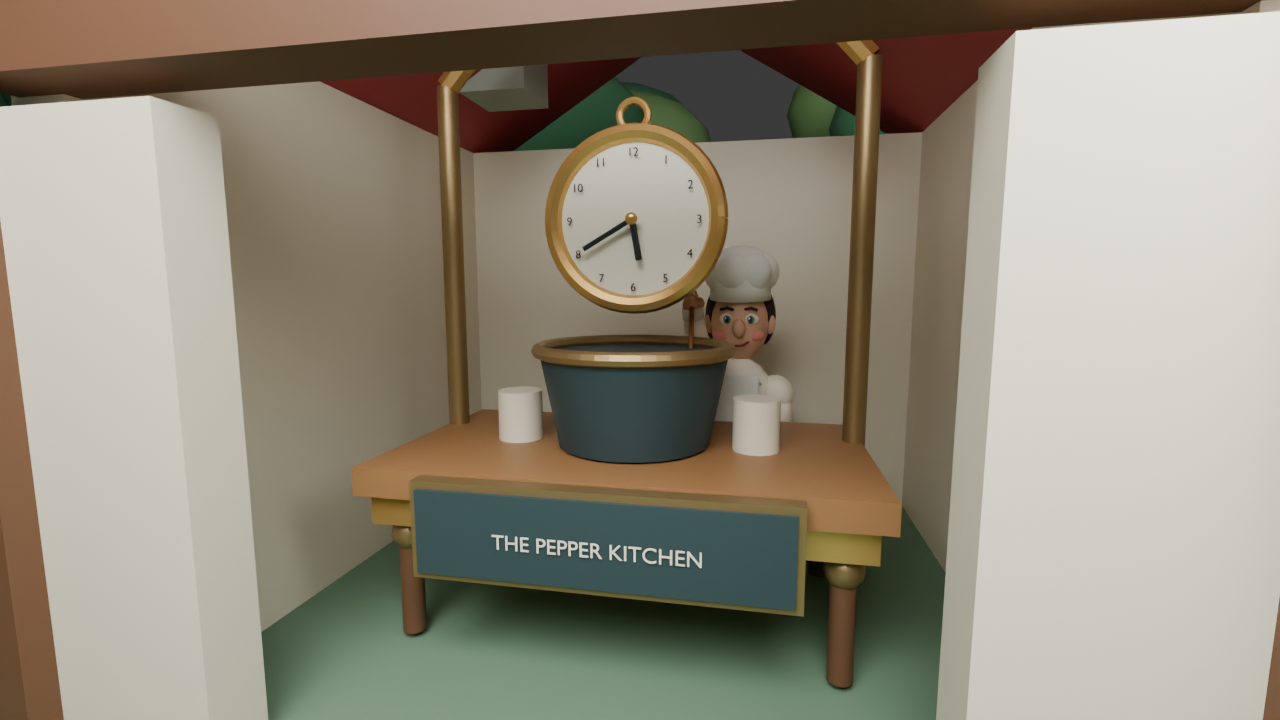
Blender inspection render. The spoon still reaches inside the pot while the hand stays above its rim.
§What the recorded run caught
Recording the solution became another test. The fan could clear smoke while I stood beside a solid kitchen wall. We restricted it to the open front and made assisted walking approach that entrance. Closing the little passage's popup also used to reopen it immediately. It now responds when you enter, so closing it lets you move again.
Slow rendering exposed a separate walking bug. The game counted at most 50 milliseconds per frame, so a slow frame also slowed the player's travel. We corrected the timing and split movement into short collision steps. Assisted walking now keeps its remaining movement when it reaches a waypoint. This fixes lost travel time; it doesn't promise a particular frame rate on a phone.
The court's approach had a wall across part of the road. We pulled that wall back and widened the hedge opening. The source of this one was embarrassingly familiar. The visible world and the walking rules had been built separately.
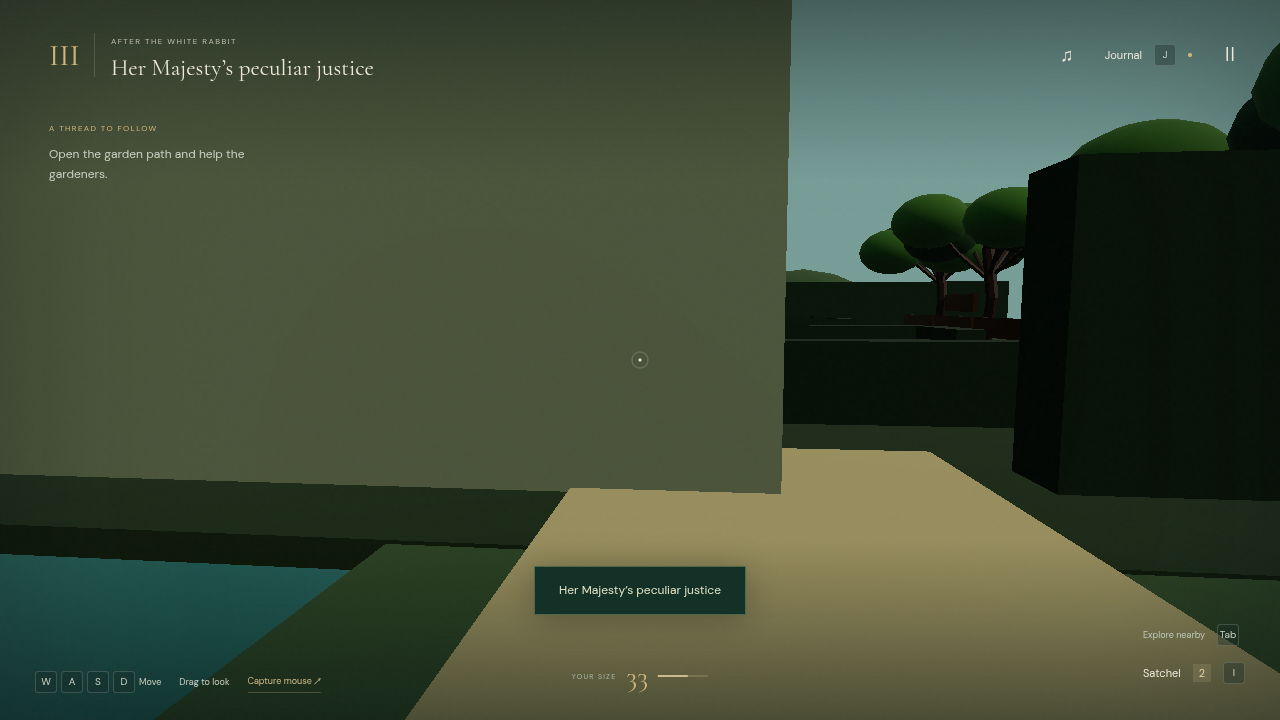
Caught during the recording. This is an intermediate build in the repair pass, not the first published release.
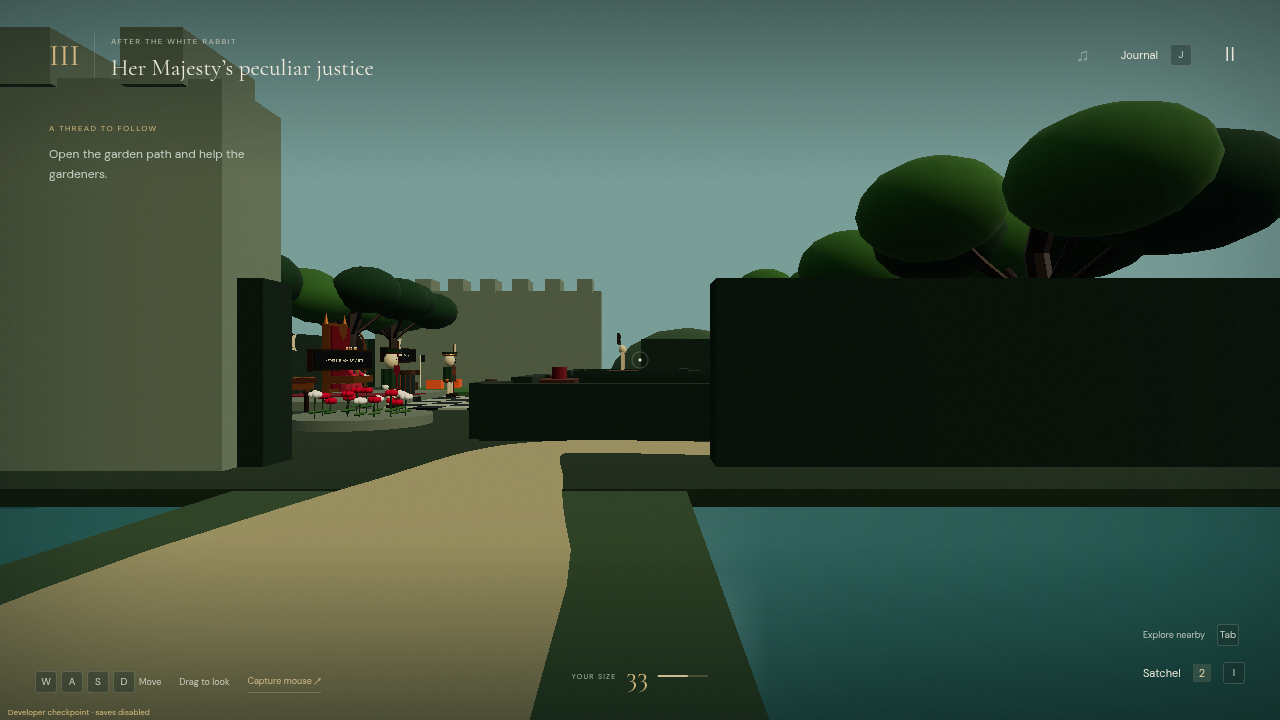
The final entrance checked in the game. The path continues around the low maze.
The earlier repair run reaches the ending through all 25 puzzles. It uses known answers and resumes ordinary saved progress after the fixes found along the way. I kept the video and solution screenshots in the walkthrough below. It is useful evidence that the route works, but a first-time player may still find a clue confusing in a way this run couldn't reveal.
I put too much weight on the answer checks. A player also has to recognize the opening, turn the key, reach the input field and walk to the next scene. Those actions need a playthrough with the actual controls. The first release hadn't earned the confidence we gave it.
§Keeping the game while changing the medium
Changing your height and comparing uniforms both work in 3D. Other puzzles rely on the cards themselves, so we had to adapt them. Matching the gardeners becomes a tool chest with matching seals. Recoloring a card header becomes painting the roses in front of you. French sound puzzles have English equivalents.
The fidelity audit records those changes and compares the puzzles with the original. It contains spoilers too.
On a phone, turn it sideways. Walk with the left joystick and look around with the right pad. Interact and Explore sit beside it, and both thumbs can work at once. Phone mode starts with reduced graphics. Your progress saves in the browser.
The automated checks cover puzzle answers, progression, saves, walking routes, animation attachments, construction rules and touch input. They missed the first-release failures above. The repair log records what we found and the checks for each fix. We still haven't tested on a physical phone.
Play After the White Rabbit. The study and walkthrough below contain the solutions.
The study compares every deduction with the original. The full walkthrough follows it on this page. Jump to the walkthrough or return to the game.
§Study appendix: puzzle by puzzle
The last puzzle made the limits of our first adaptation obvious. Clicking a floor ring moved the camera to an exact view and recorded its number. A separate set of painted strips appeared after construction. You could finish without doing much looking.
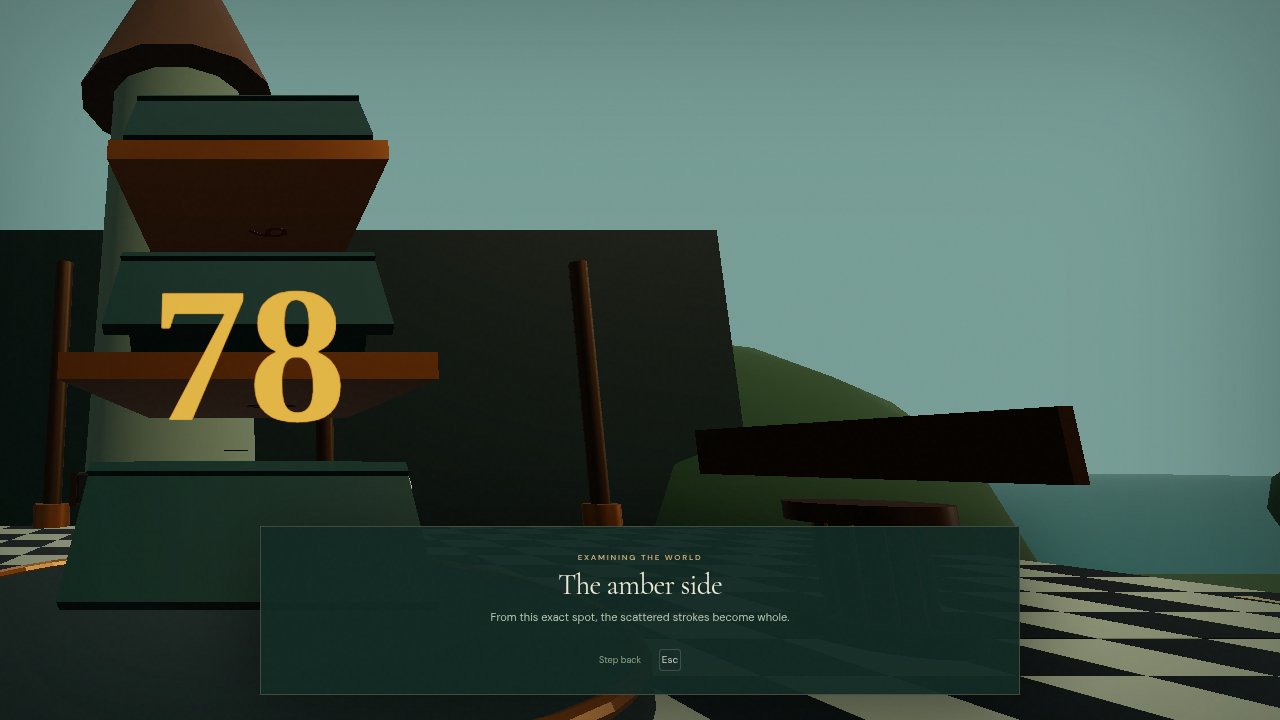
Before. Captured from the earlier repair build. The ring supplied the view and recorded the answer without asking you to read it.
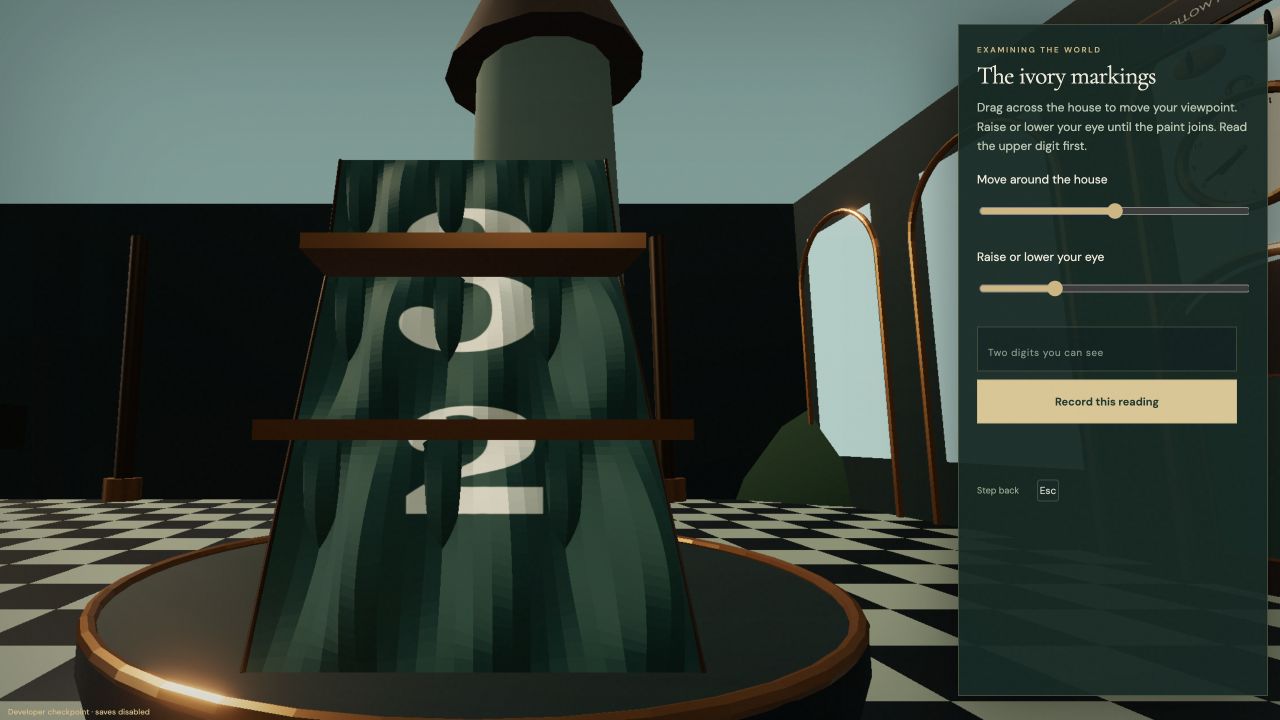
We rebuilt the house in Blender with folded, ribbed surfaces and put the paint directly on those surfaces. Moving a piece now moves its part of the image. You choose a piece and a socket, swap mistakes, turn the bridges over, then adjust your viewing angle and eye height. Nothing records a sightline until you enter the number you read.
Our first attempt at the replacement used flatter folds. The number stayed too readable from an oblique view, so we added depth to break the strokes apart. We also had to give each fold an unpainted underside. Otherwise the opposite color showed through from behind.
The ribs are our own architectural choice. They give the paint changes in depth and let it break apart as you move. We still use fixed sockets, so this does not reproduce the dexterity of balancing paper. The booklet's written sequence has nine items while its numbered diagram has eight; we follow the written sequence.
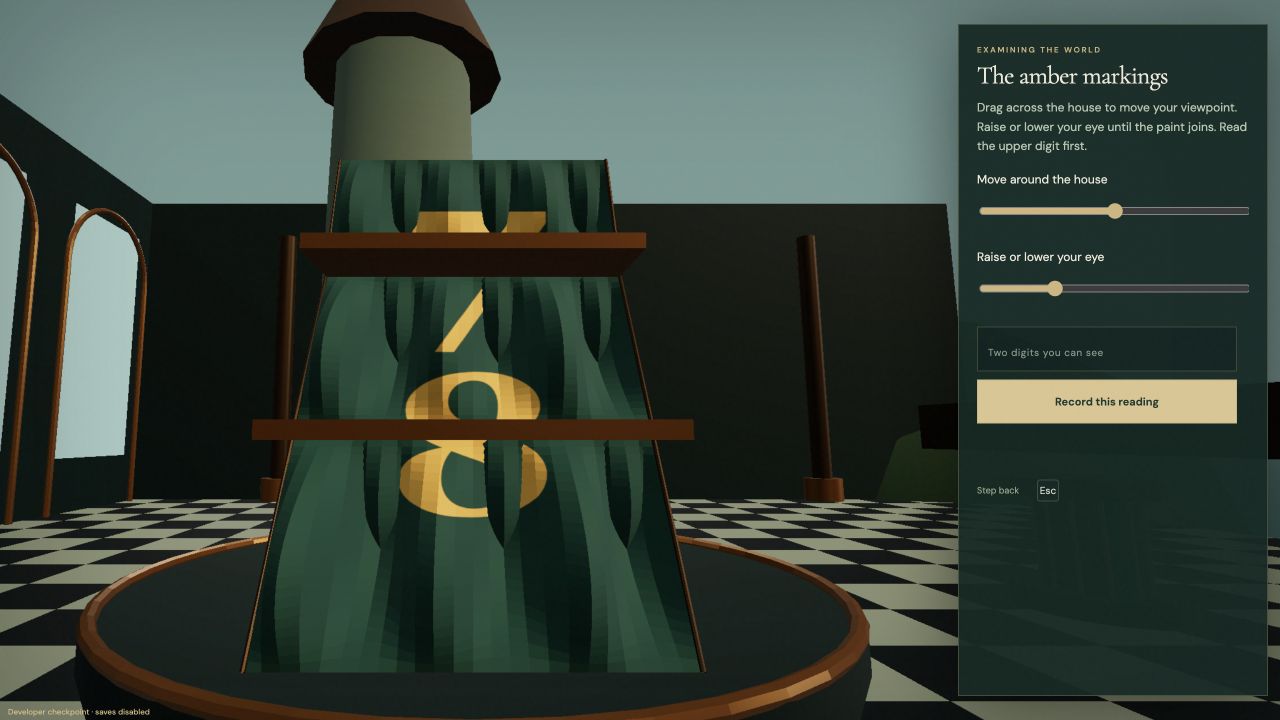
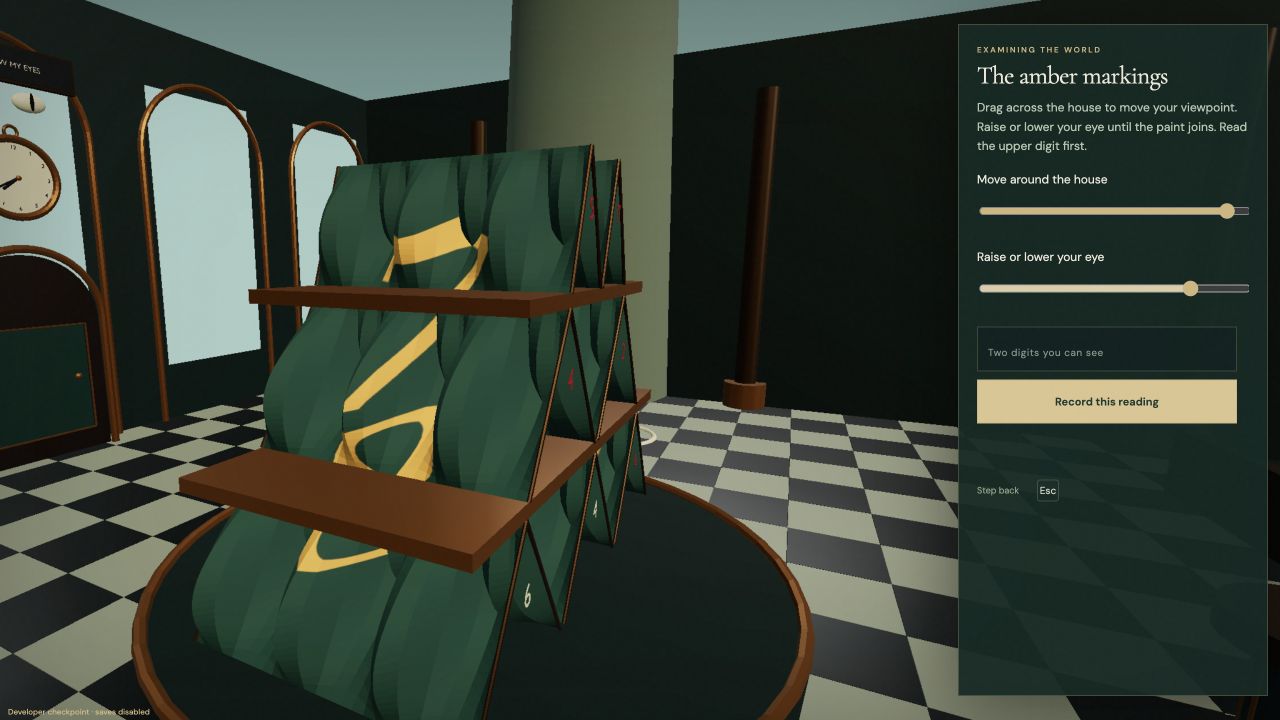
Before adjusting the viewpoint. Dragging the scene or using the two sliders changes where you look from.
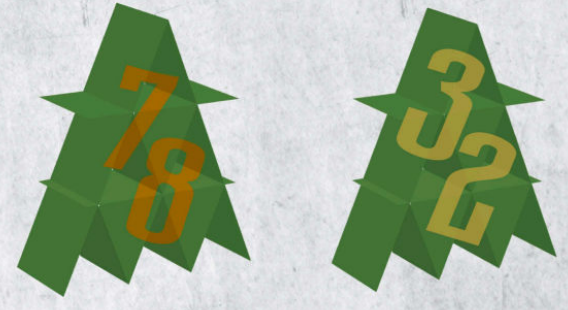
These comparisons are grouped by deduction and interaction, so their count differs from the game's completion counter. Each pair shows a crop from the original solution beside a screenshot of our adaptation. Click either image to enlarge it. The PDF links open the source page. Original artwork is credited to Space Cowboys; the browser screenshots come from our recorded playthroughs and repair checks. The house images show the latest rebuild.
Some original tasks run in the companion app. For those, the crop shows the relevant card or instruction in the solution booklet, rather than an app screen. The notes describe where our version changes the task.
01. The storybook
Original · PDF p. 1
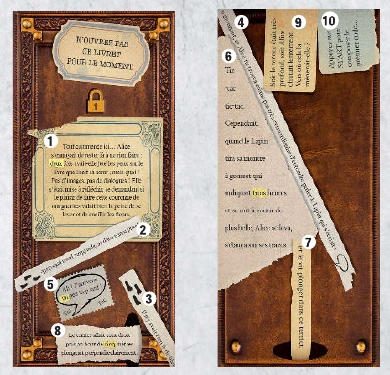
Order ten memories; read highlighted numbers.
Our 3D adaptation
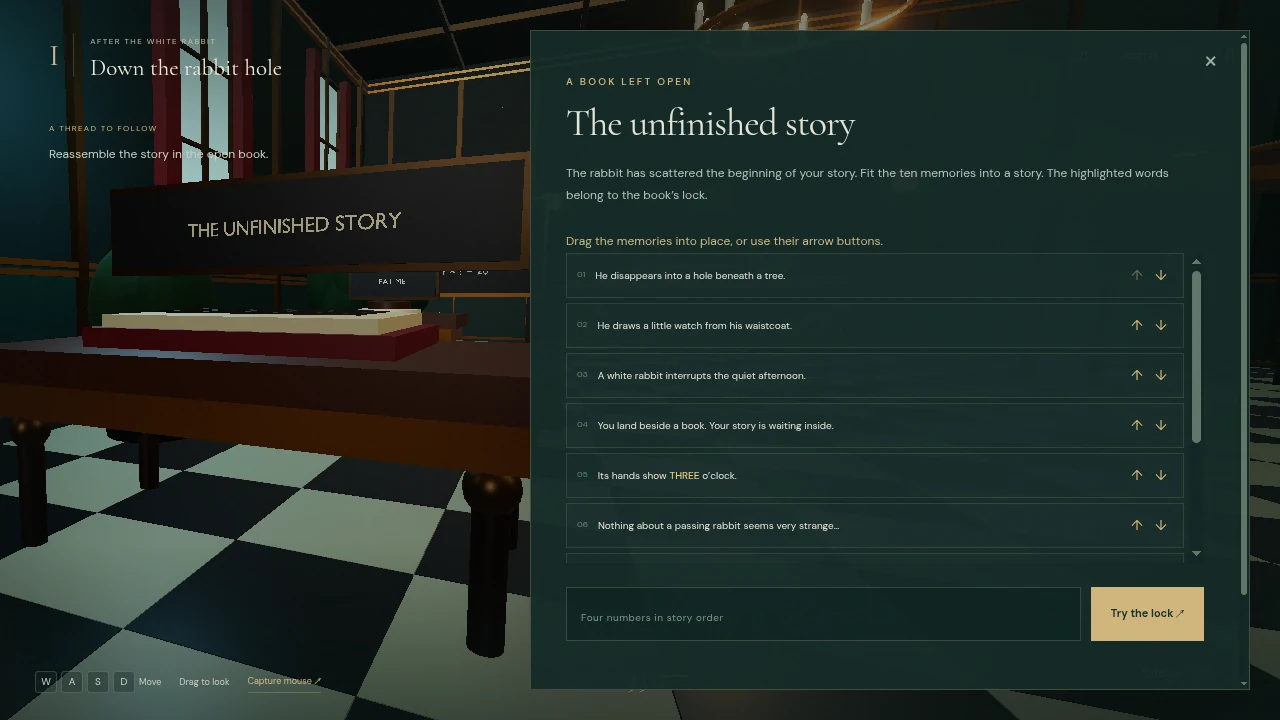
We kept the chronological deduction in a book on the hall table. Dragging fragments is close to the paper task; the arrow buttons make it possible on a phone. The scene gives the book a place, but this is still mostly a reading puzzle.
02. The sideways letter and its shadow
Our 3D adaptation
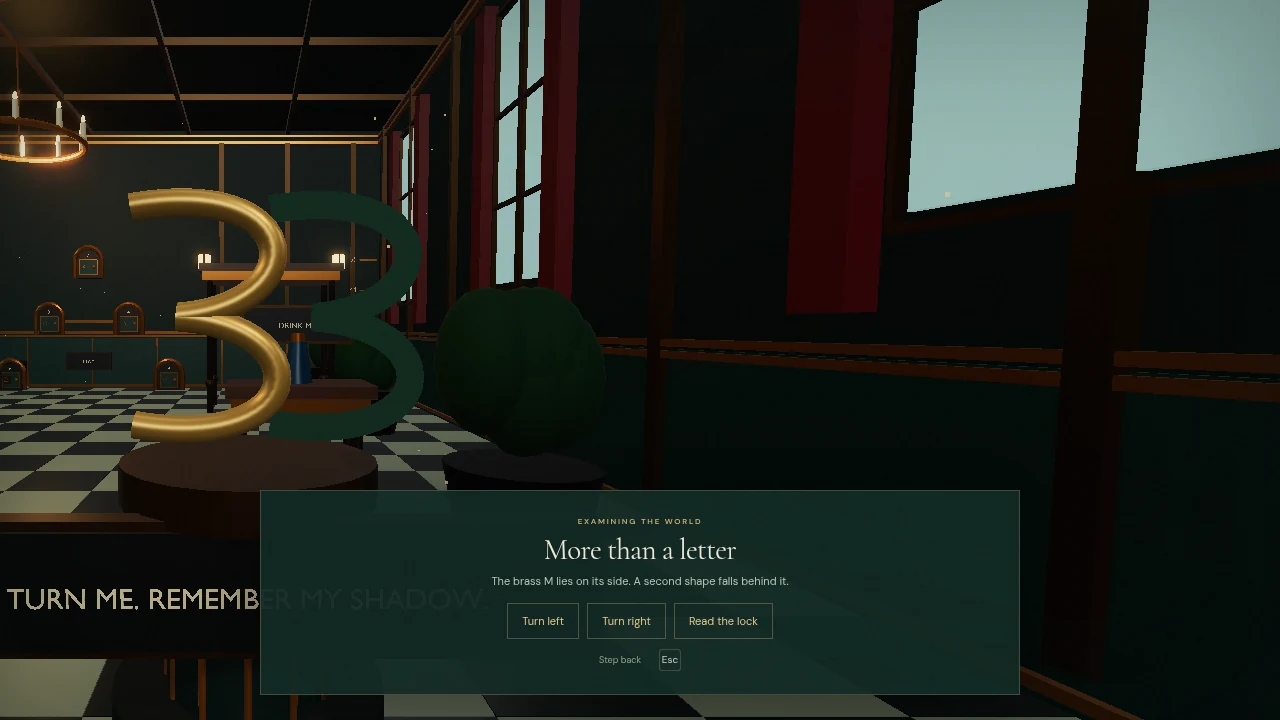
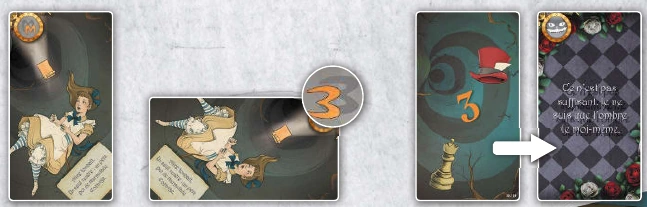
A brass shape rotates in the room, with a second shape behind it. This transfers well because the player changes an object's orientation and looks again. The second shape is deliberately modeled; it is not a physically simulated shadow.
03. The cat's arithmetic
Original · PDF p. 2
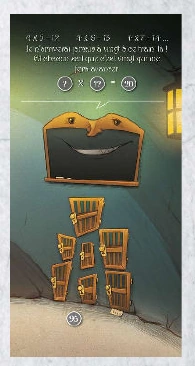
Continue the unusual multiplication sequence.
Our 3D adaptation
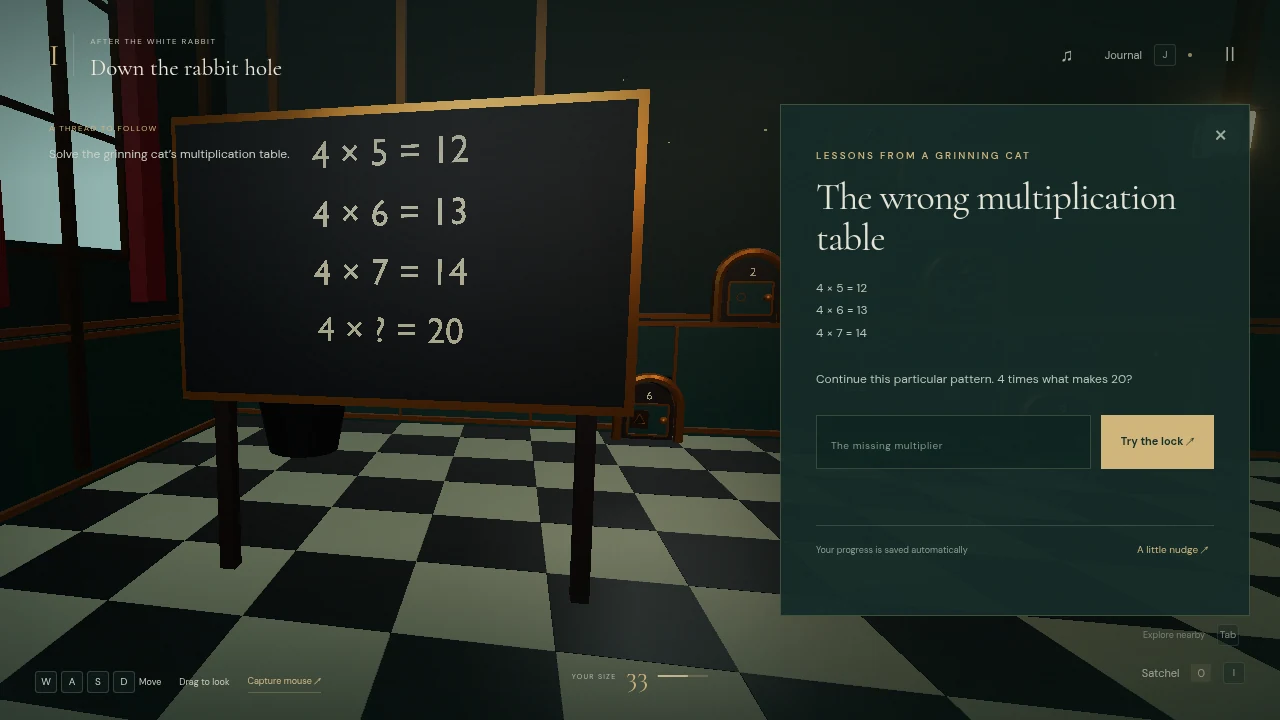
The equations live on a blackboard. The reasoning is almost unchanged. Giving a written puzzle a 3D wall does not add much by itself, so the board stays a short stop within the hall.
04. The missing letter
Our 3D adaptation
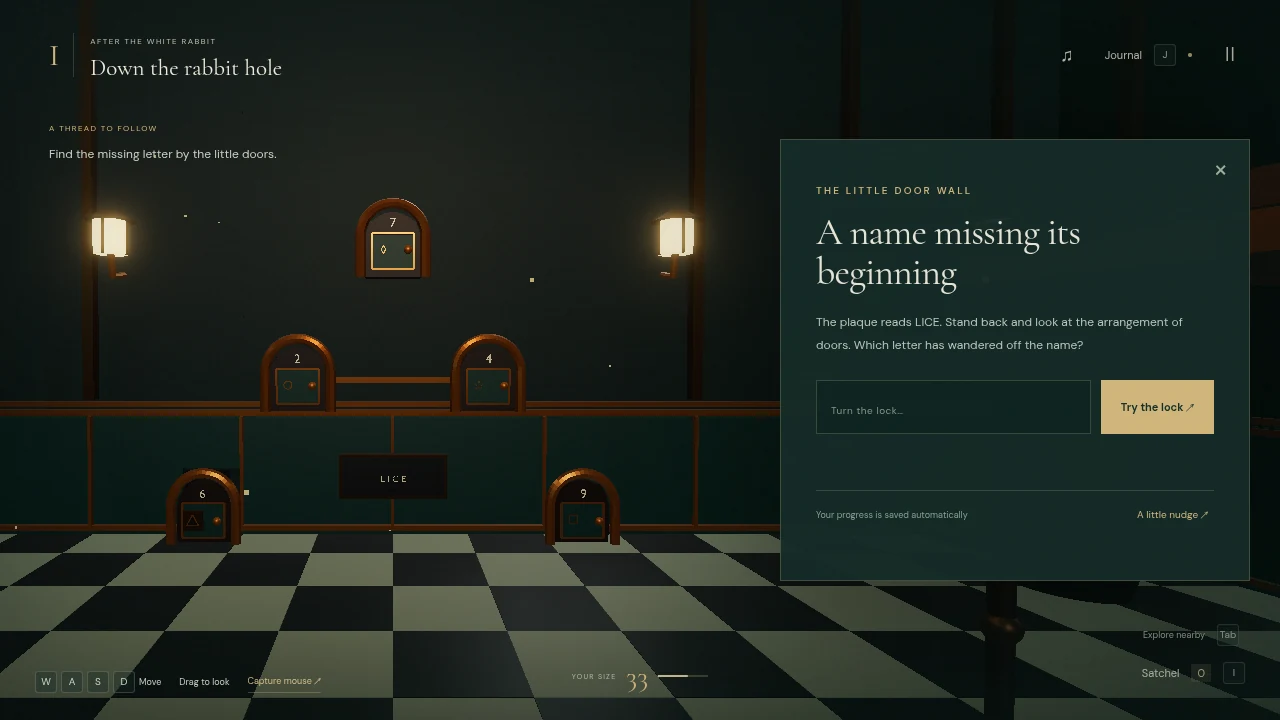
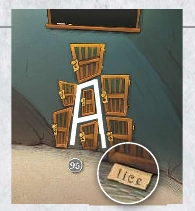
The doors form the visual clue together. Our first frames overlapped and obscured it. Separating the openings mattered more than adding decoration, and examination now includes the whole wall.
05. Growing to the key
Original · PDF p. 2
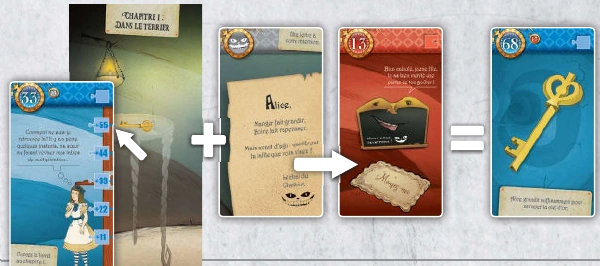
Compare Alice's height with the table.
Our 3D adaptation
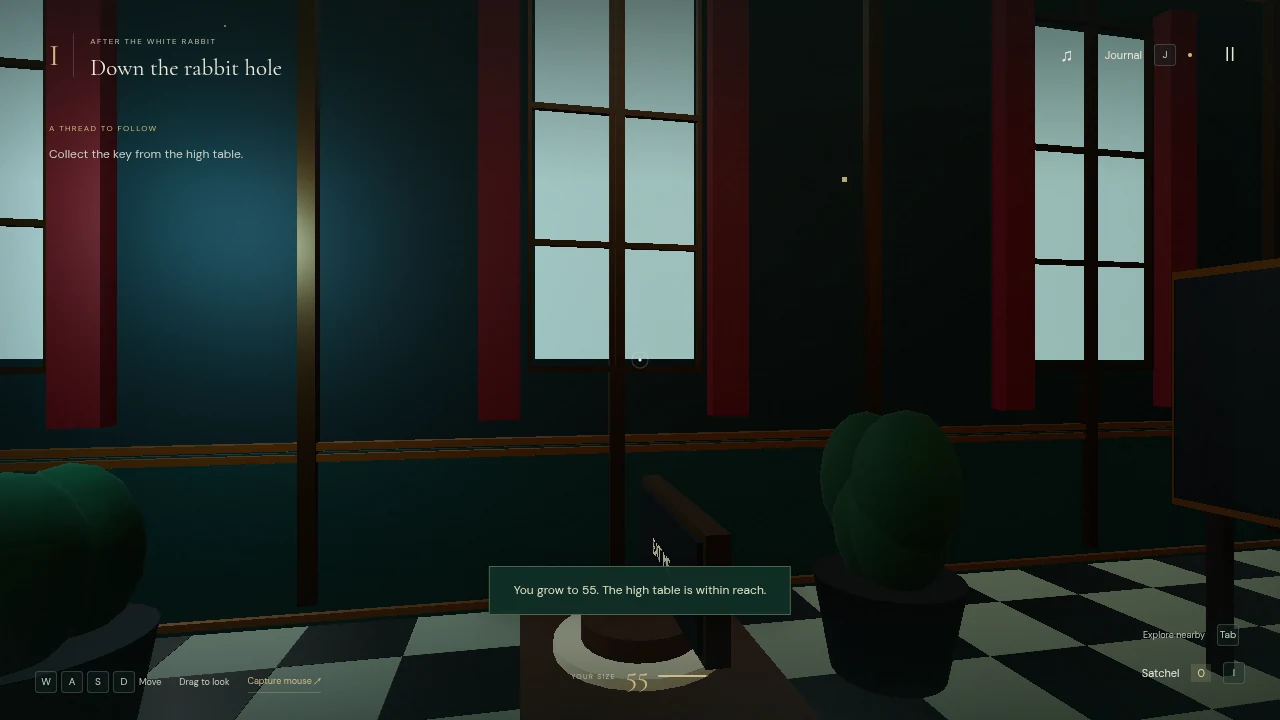
The high table, height scale and key share a room. Eating raises the camera and makes the key reachable. This replaces card-number arithmetic with a physical reach requirement. Cake can no longer shrink Alice.
06. The triangular lock
Our 3D adaptation
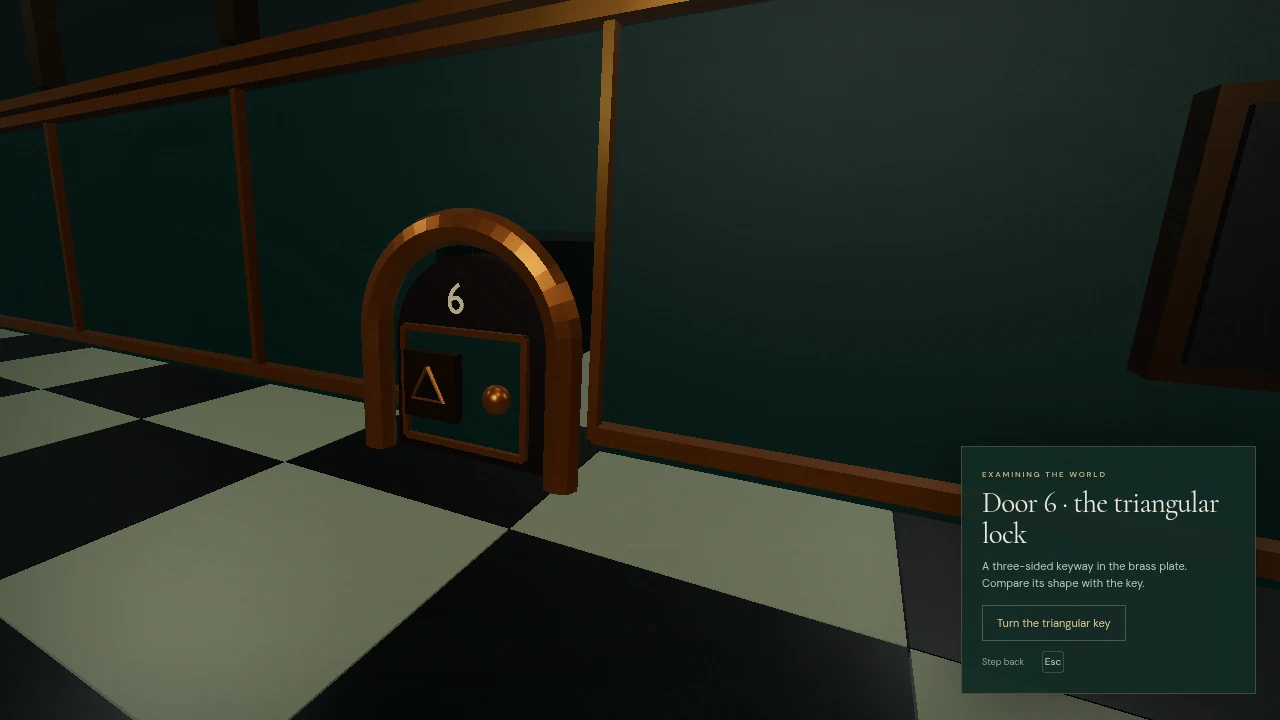
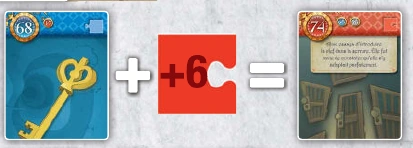
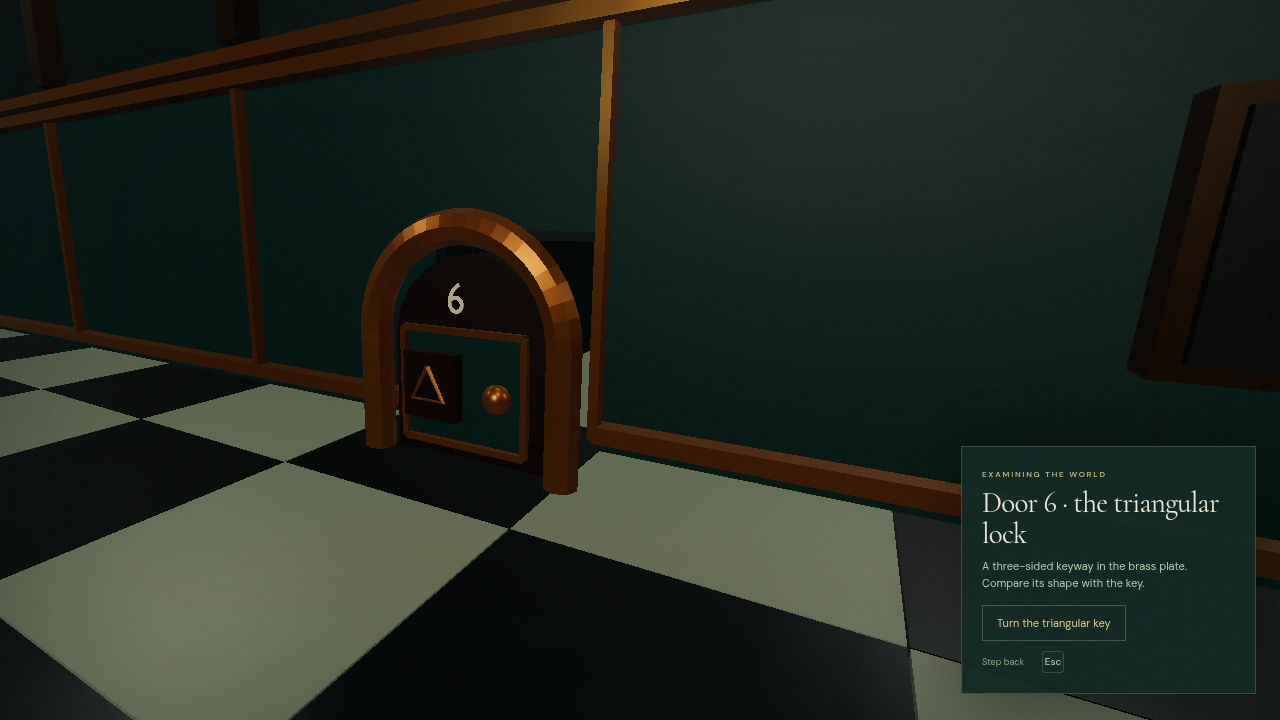
You compare the tooth with a brass keyway and turn the key in a hinged door. A previous extra height check blocked a key already in the satchel. Removing that check lets the visible lock explain the interaction.
07. Shrinking through the opening
Original · PDF p. 2
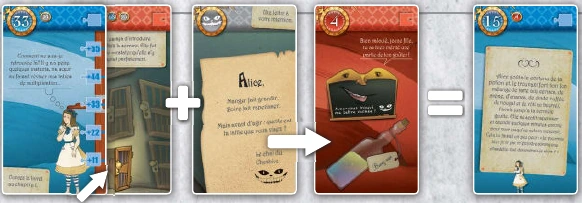
Drink to fit the small door.
Our 3D adaptation
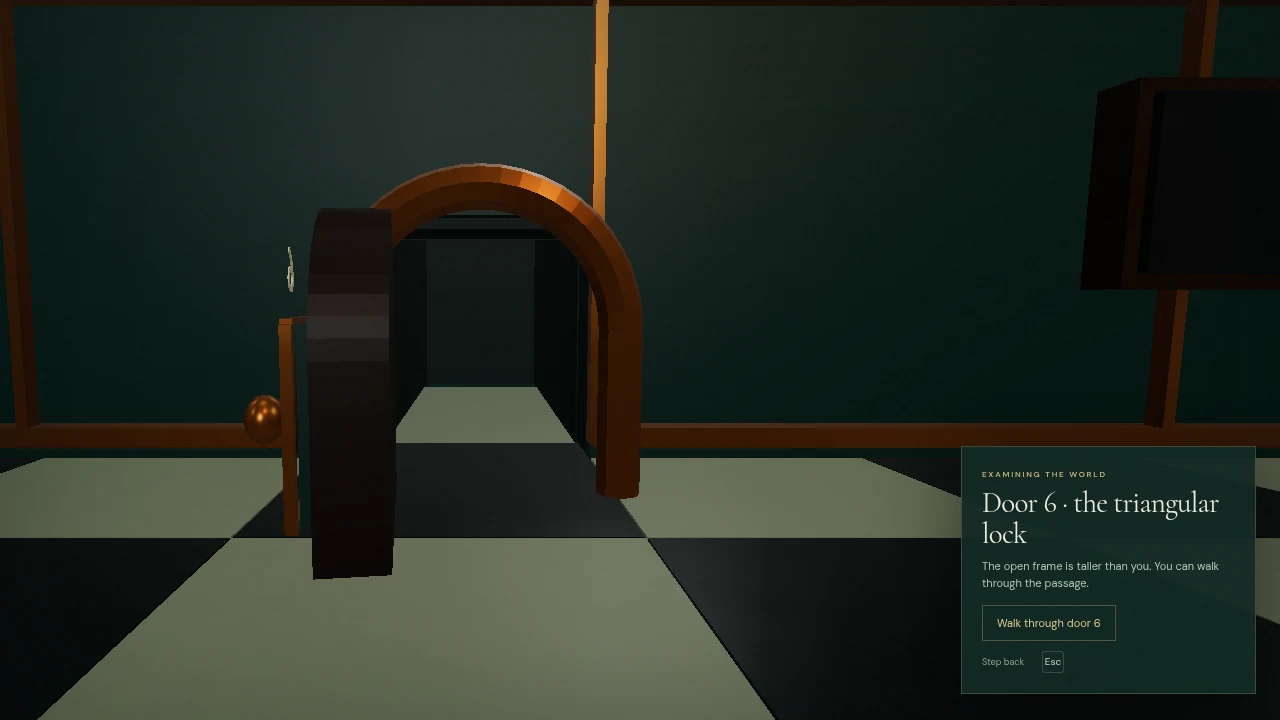
The bottle lowers Alice's size and the player crosses a real opening. We rebuilt its dimensions after the first doorway looked passable at sizes the code refused. The bottle remains reusable.
08. The missing feet
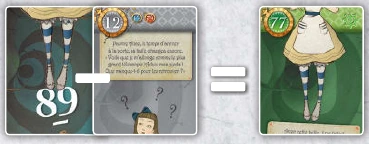
Our 3D adaptation
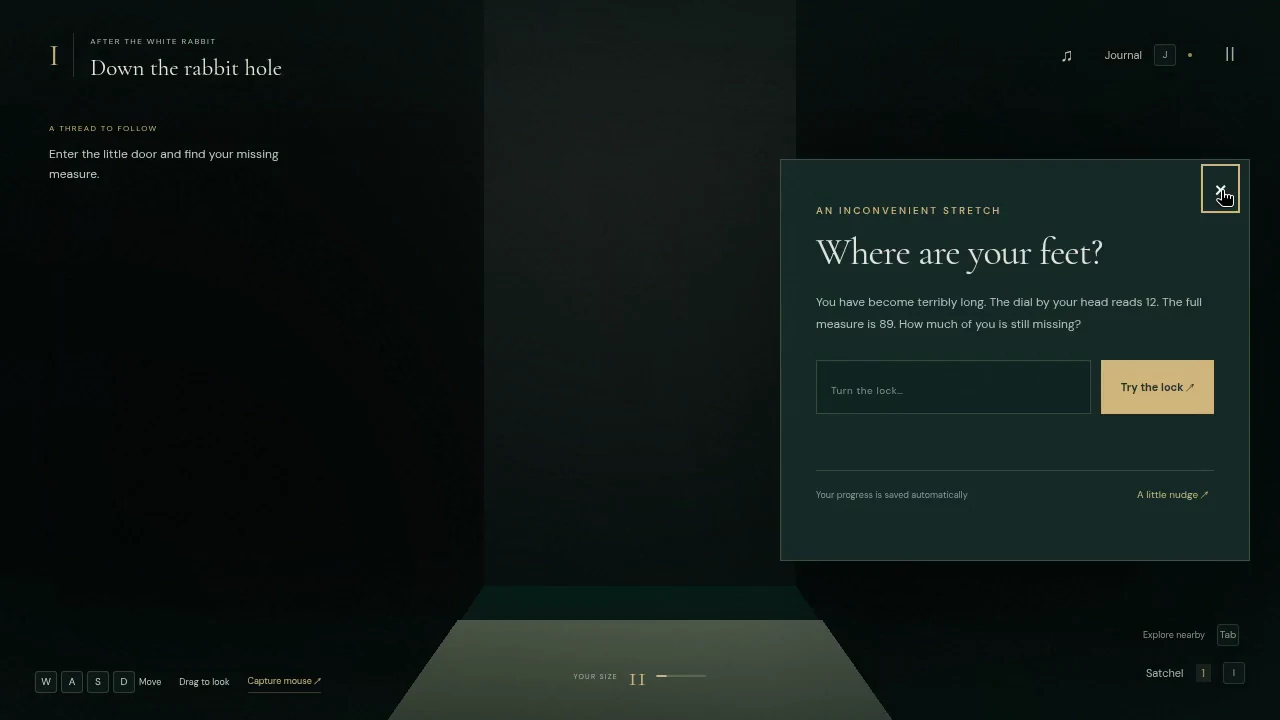
The small passage presents the same subtraction. The act of crossing replaces combining cards. The popup now waits for a new entry instead of reopening every frame after being closed.
09. Looking up
Original · PDF p. 3
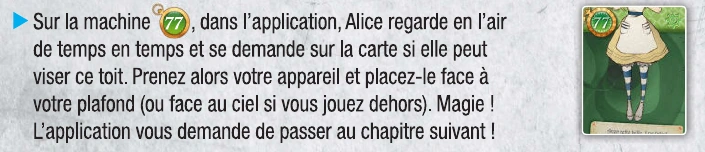
Point the phone toward the ceiling.
Our 3D adaptation
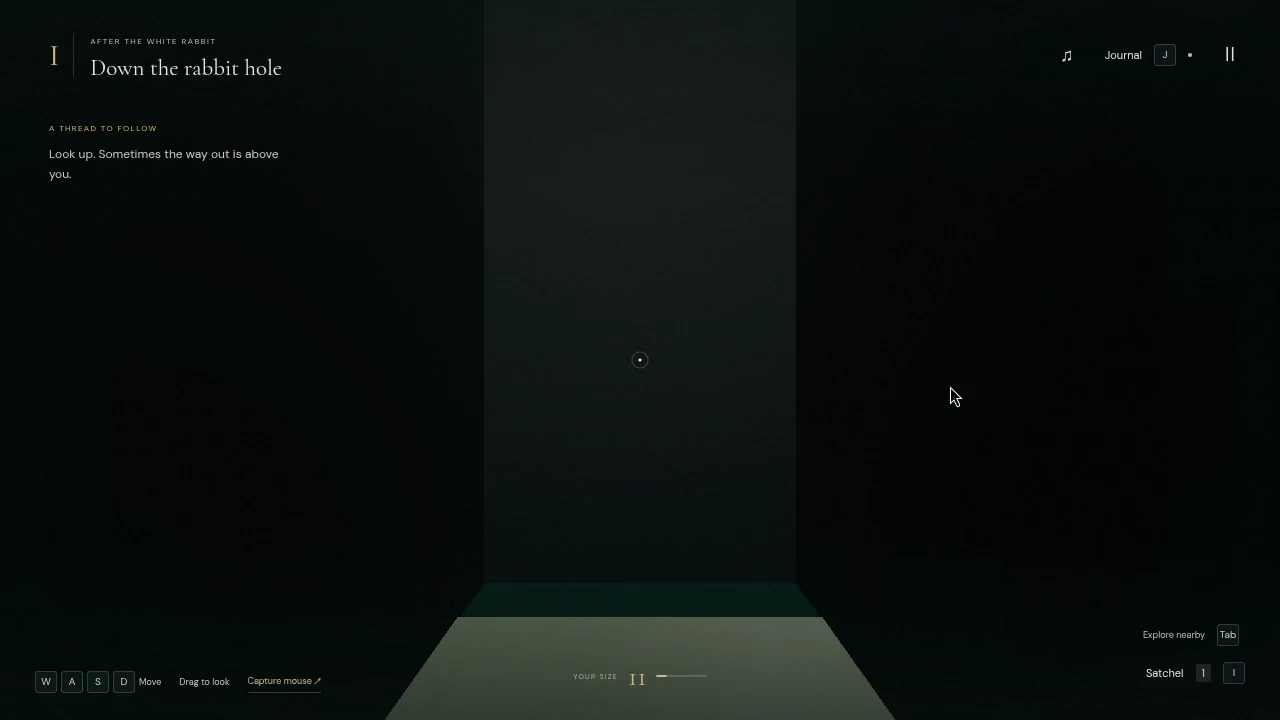
We use the camera's upward look to leave the hall. That preserves the change in attention but replaces the original device gesture. Desktop dragging and the phone look pad both work without motion-sensor permission.
10. The caterpillar's smoke
Our 3D adaptation
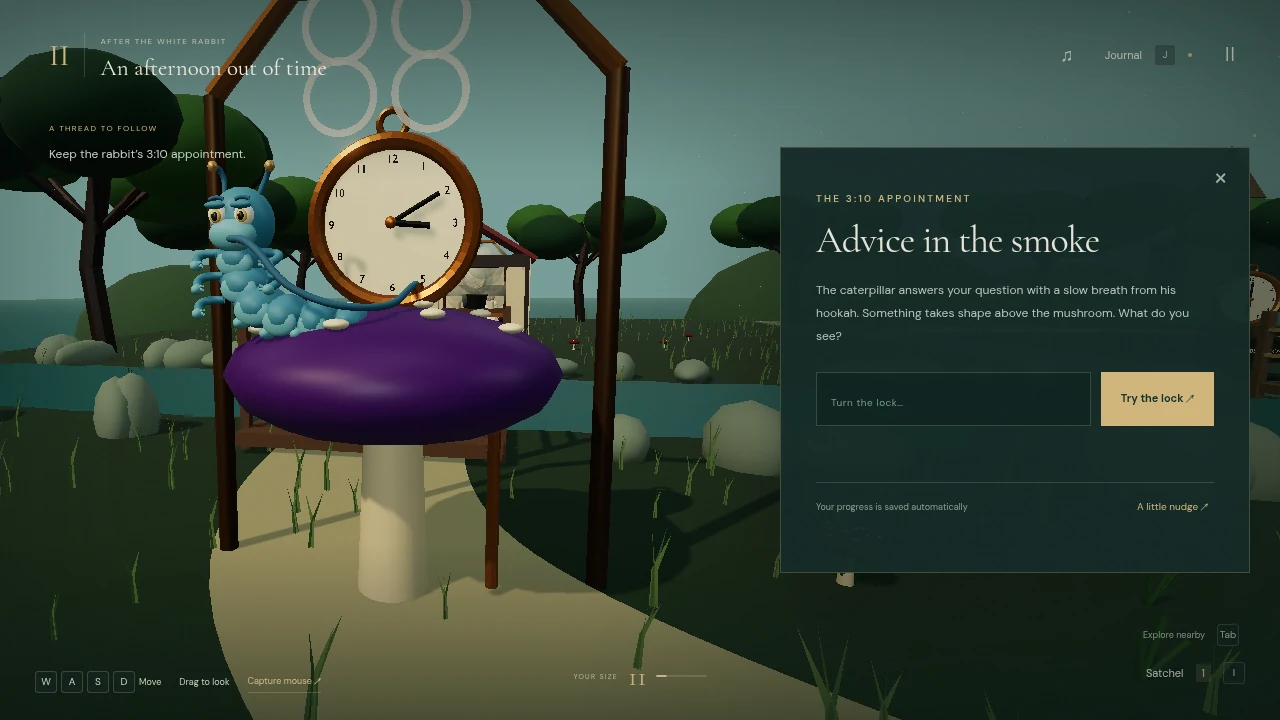
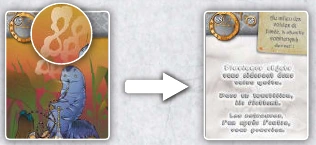
Smoke rings form the visual clue above the caterpillar. We had to include them in the examination frame and keep the animated body clear of the clock. A good character animation can still ruin a puzzle if it hides the evidence.
11. The solitary mushroom
Our 3D adaptation
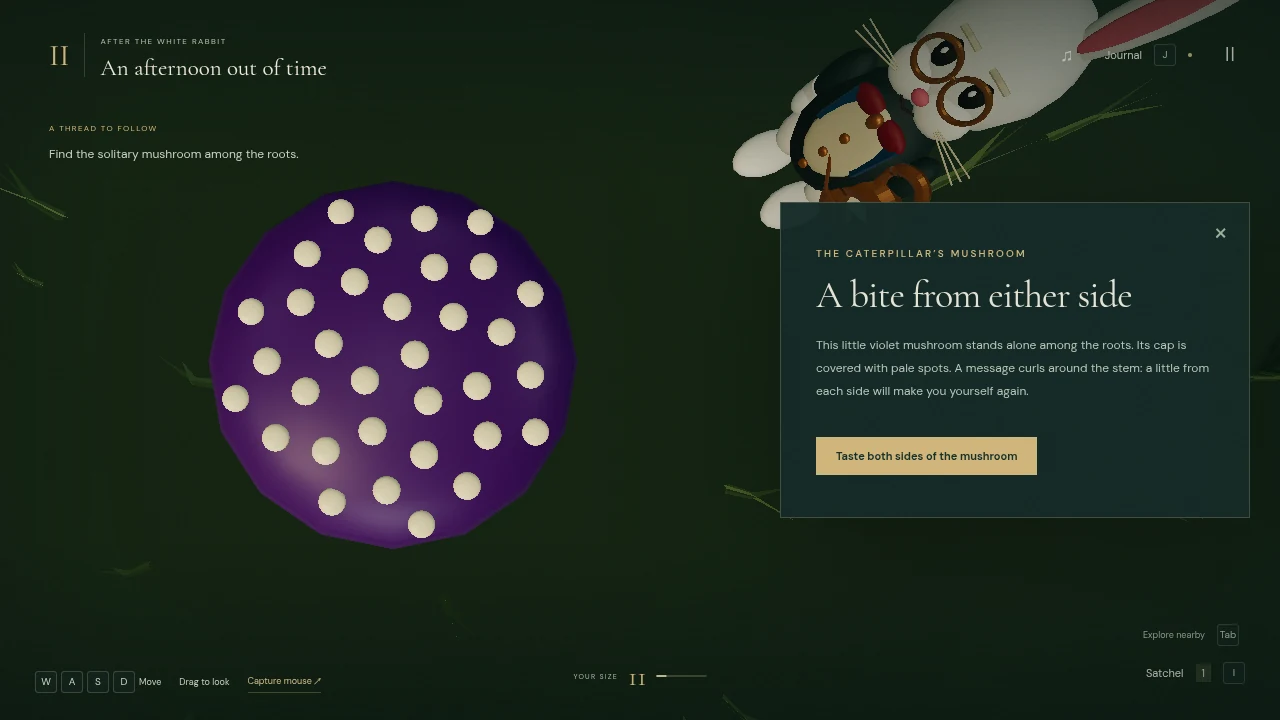
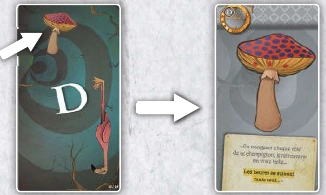
A separate mushroom sits among roots, with countable spots. Alice reaches the woods small and regains normal size here. We removed the outdoor speed penalty so this story beat does not make exploration drag.
12. The messenger
Our 3D adaptation
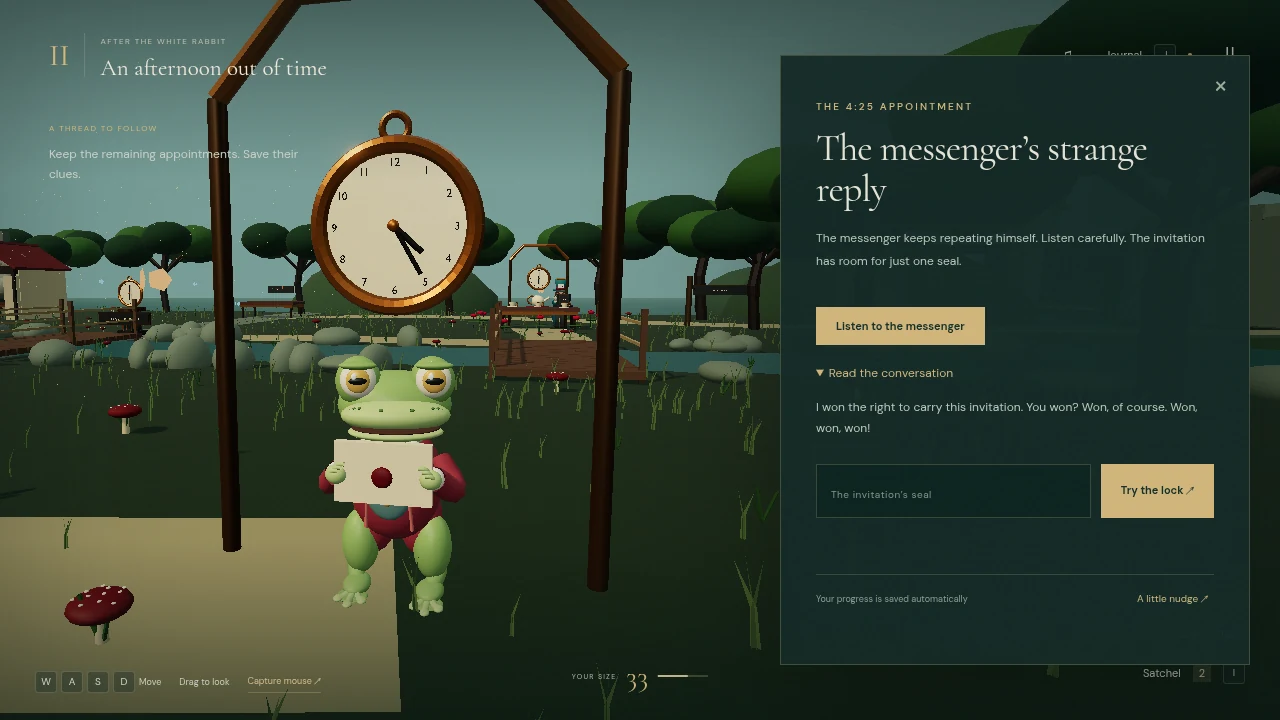
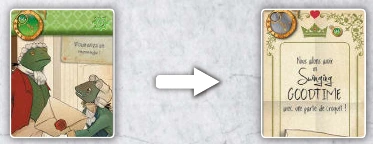
The frog uses won/one in English, with optional speech and a transcript. This preserves listening for a repeated sound rather than translating the French dialogue word for word. His mouth and throat now move during speech.
13. The fan and pepper kitchen
Our 3D adaptation
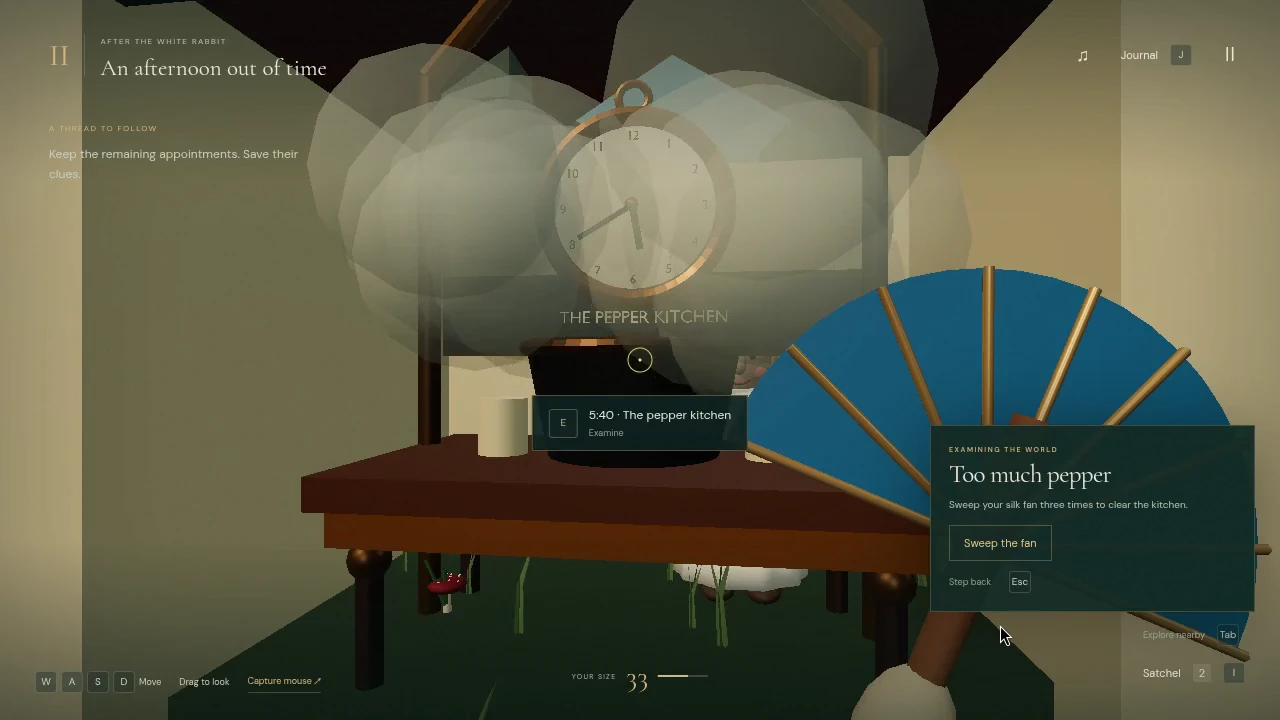
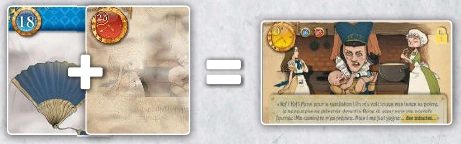
You collect a fan in the valley and sweep it at the cottage's open front. Card combination becomes a tool action. The first version accepted the side wall as an approach, which broke the scene's logic even though progression worked.
14. Tea with the Hatter
Our 3D adaptation
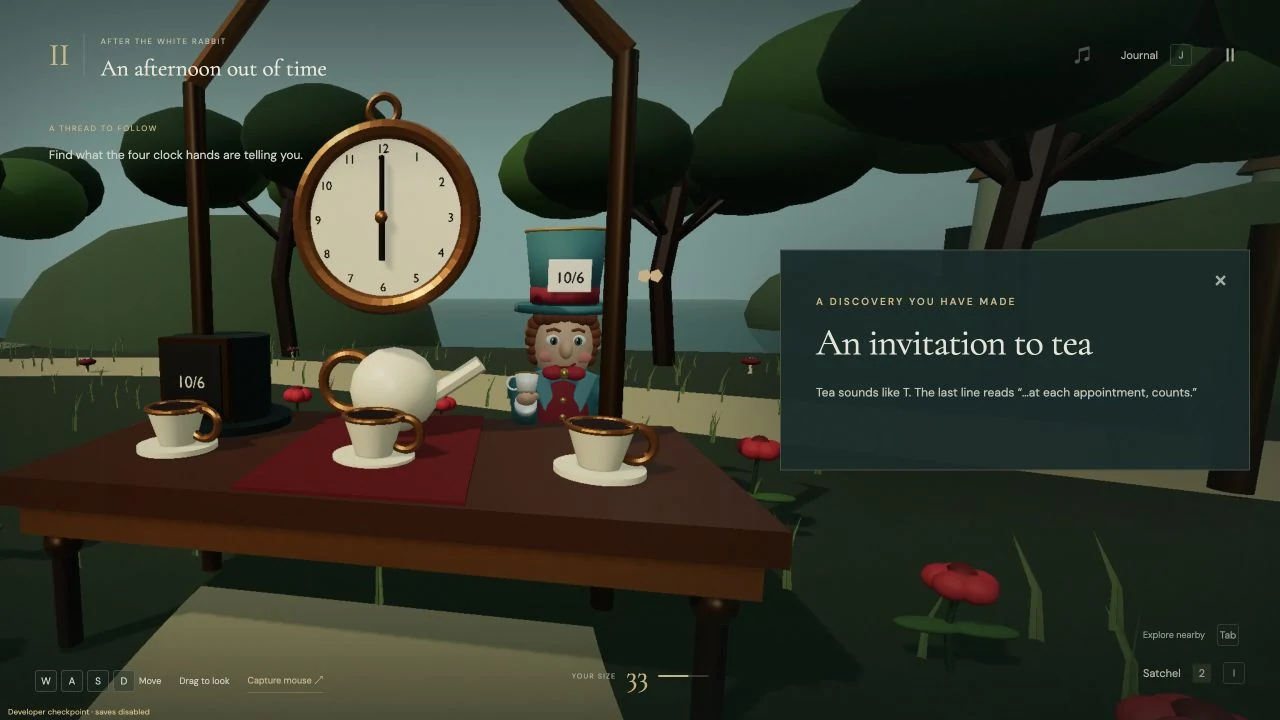
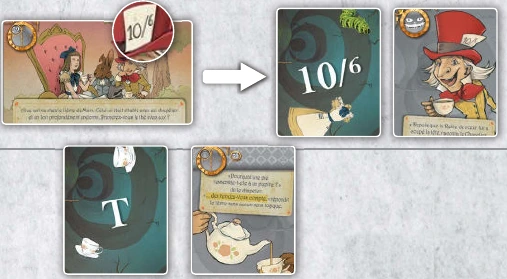
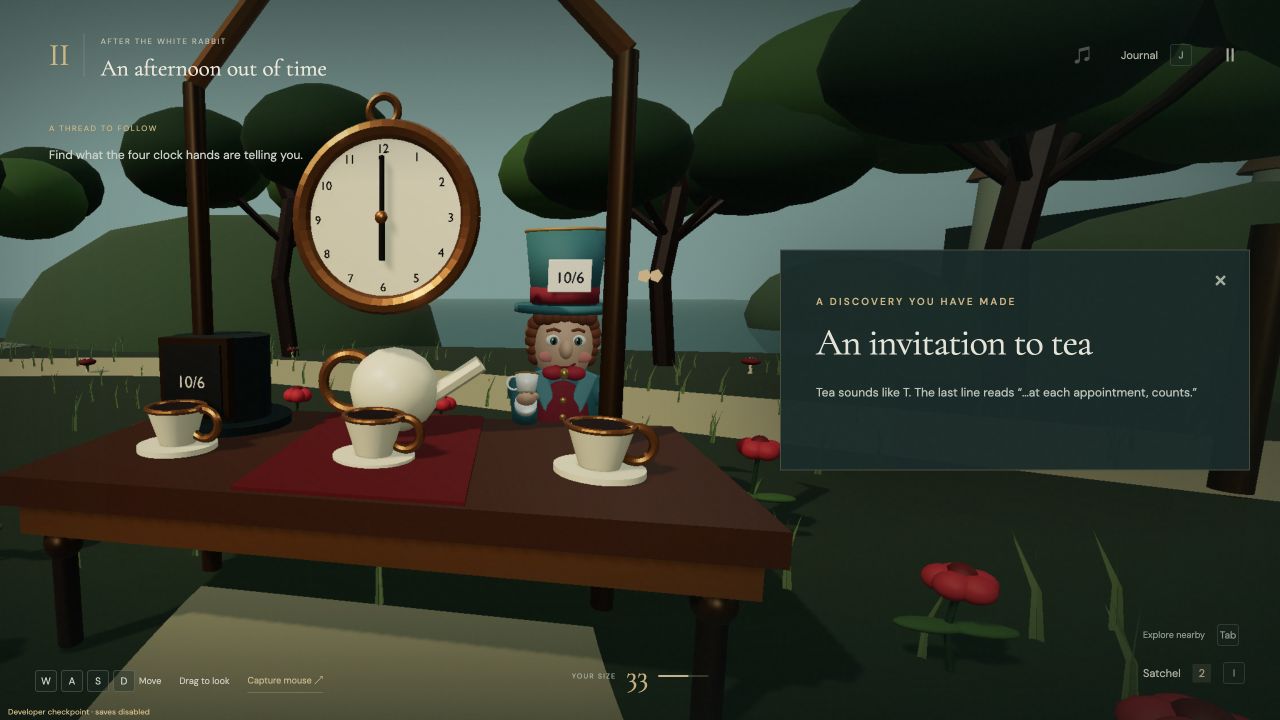
The tea-to-letter deduction survives in English. The price tag stays visible as a distraction. We moved the spare hat because it concealed the new Hatter's face, while keeping the clue props.
15. The four appointments
Our 3D adaptation
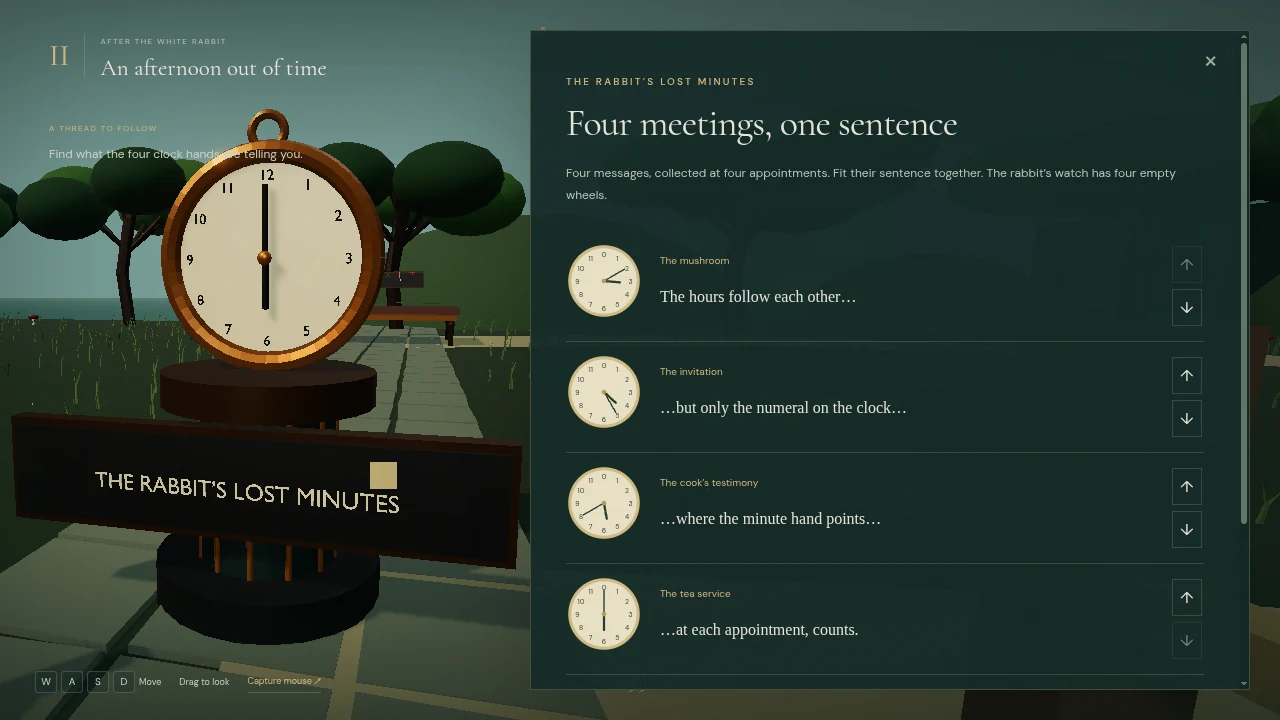
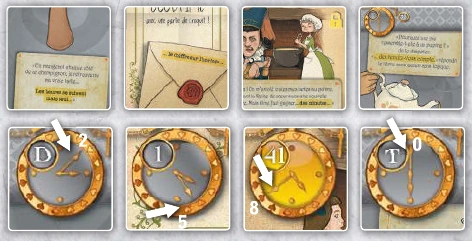
Four visits give messages, and the player orders them beside the clocks. This keeps the cross-reference between text and hands. An early journal entry explained that connection too soon; we removed it.
16. The colored crossing
Our 3D adaptation
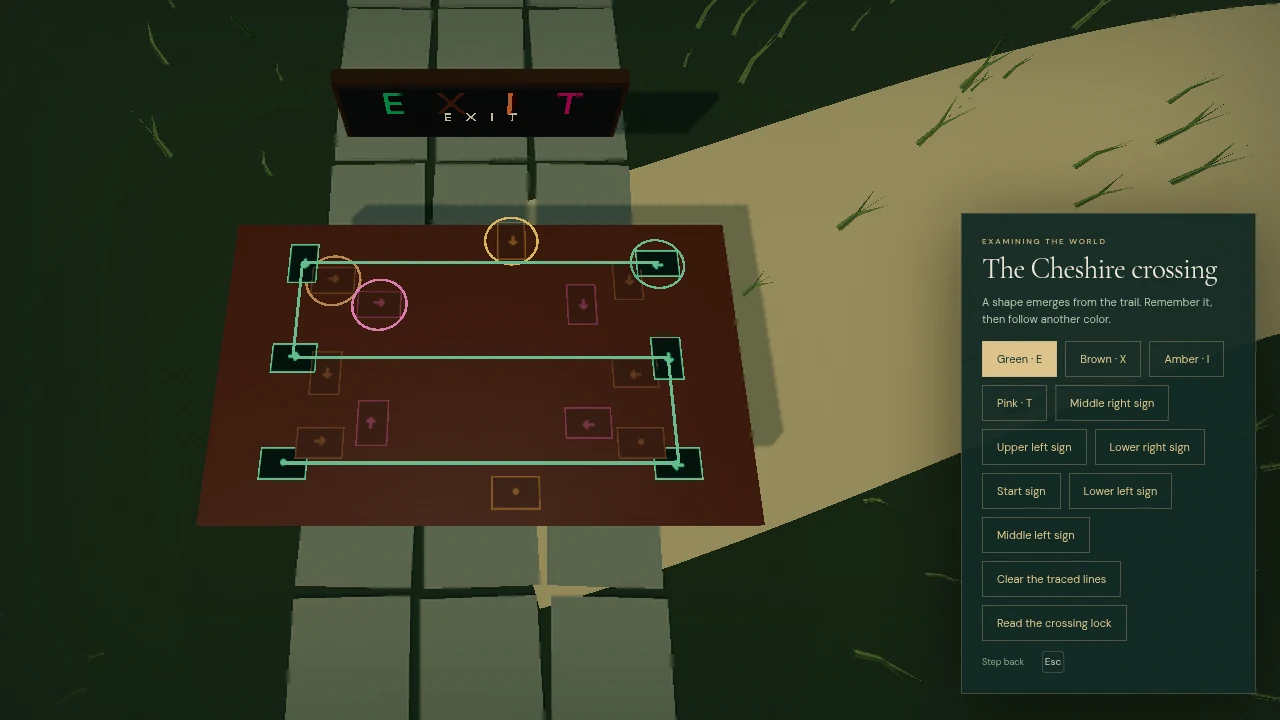
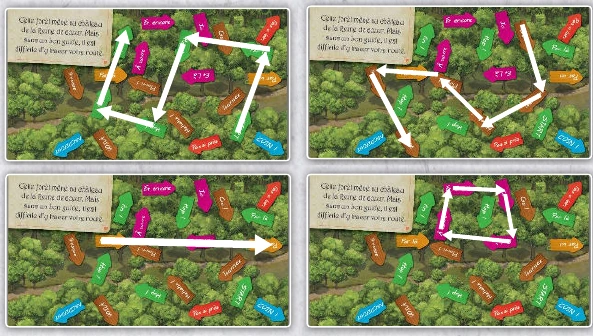
The mixed signs occupy a table and draw trails only as you trace them. A previous diagram showed the completed shapes before any deduction. The revised table preserves the tracing task but uses a new layout.
17. The three hedge paths
Original · PDF p. 5-6
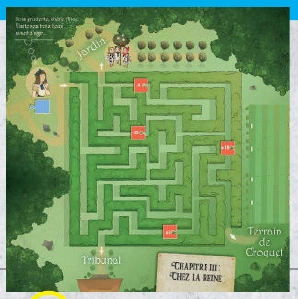
Apply three operations to Alice's size.
Our 3D adaptation
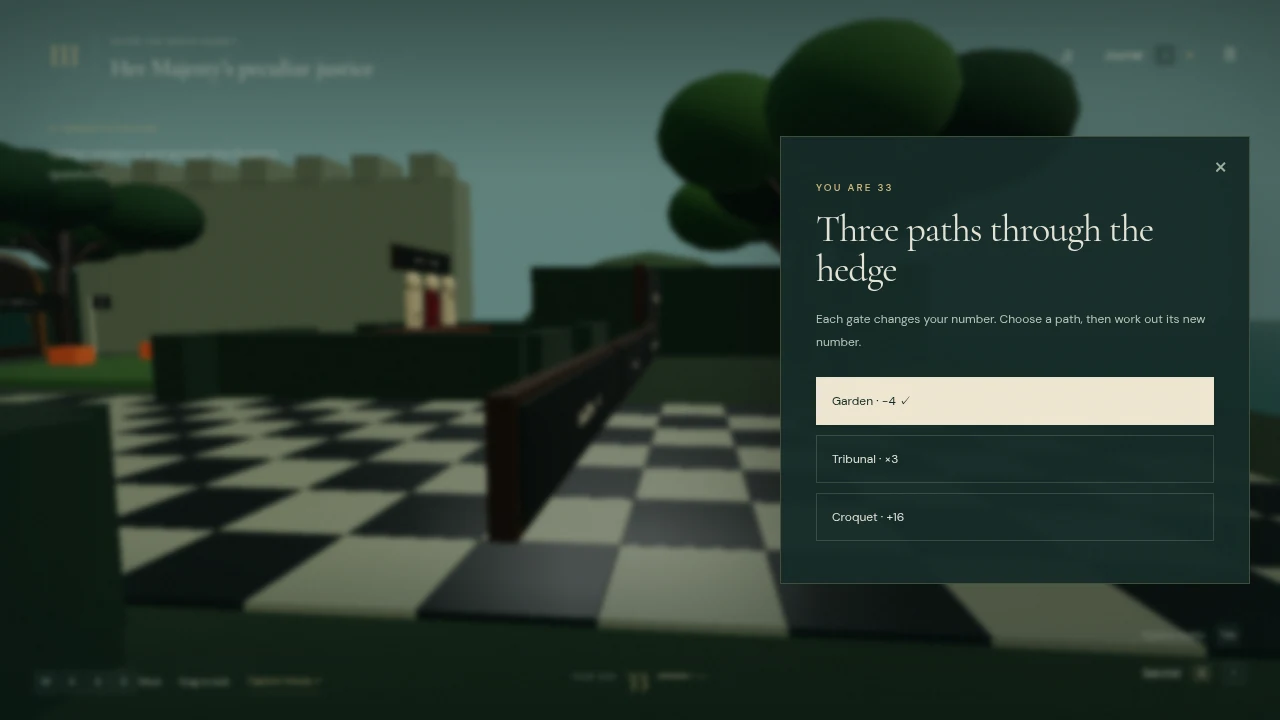
The same calculations open gates to the garden, tribunal and croquet lawn. Separate paths make the court explorable. We also repaired a wall across its approach; correct gate arithmetic was not enough to make the route work.
18. Recognizing the gardeners
Original · PDF p. 5
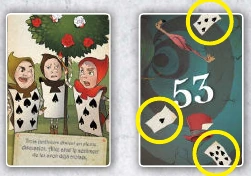
Match gardeners with their card-back symbols.
Our 3D adaptation
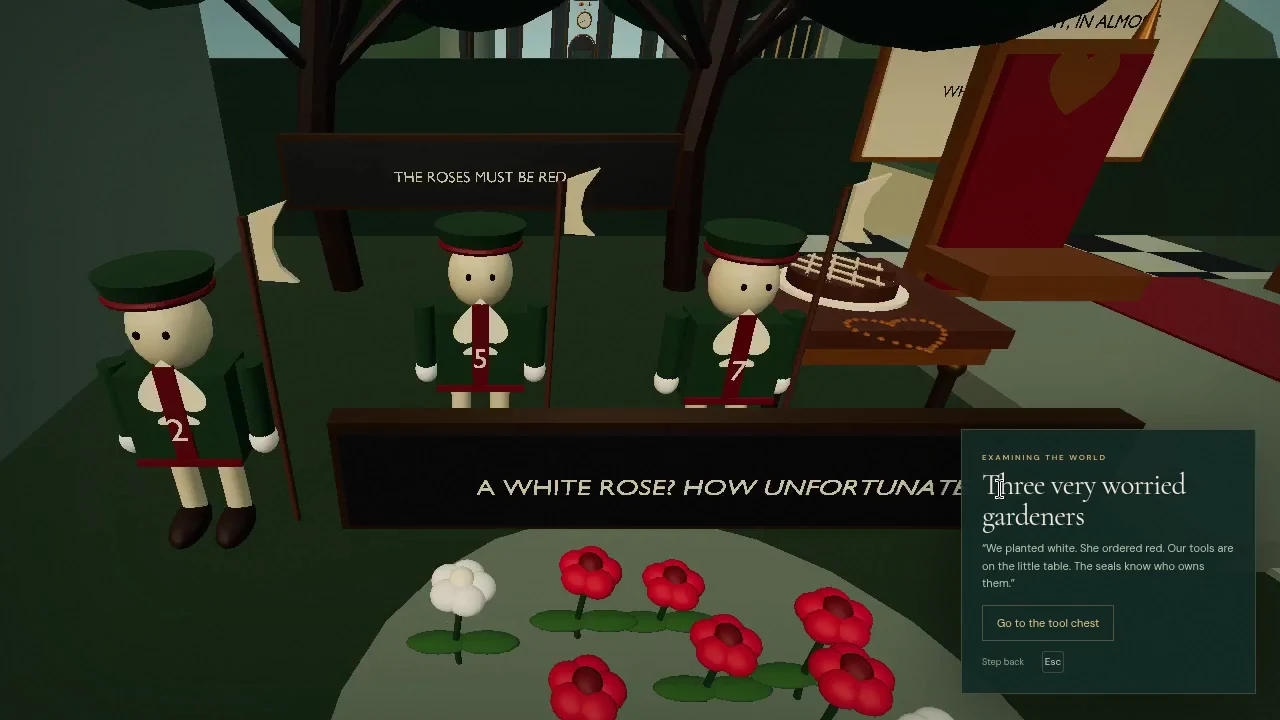
Their tunic numbers identify seals on a tool chest. This is a larger translation because there is no deck to search. The chest gives the observation a use, but loses the original familiarity of noticing a previously seen card back.
19. Painting the roses
Original · PDF p. 5
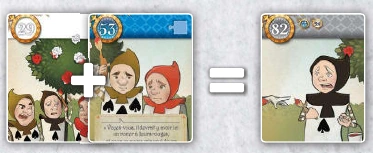
Recolor the white card header.
Our 3D adaptation
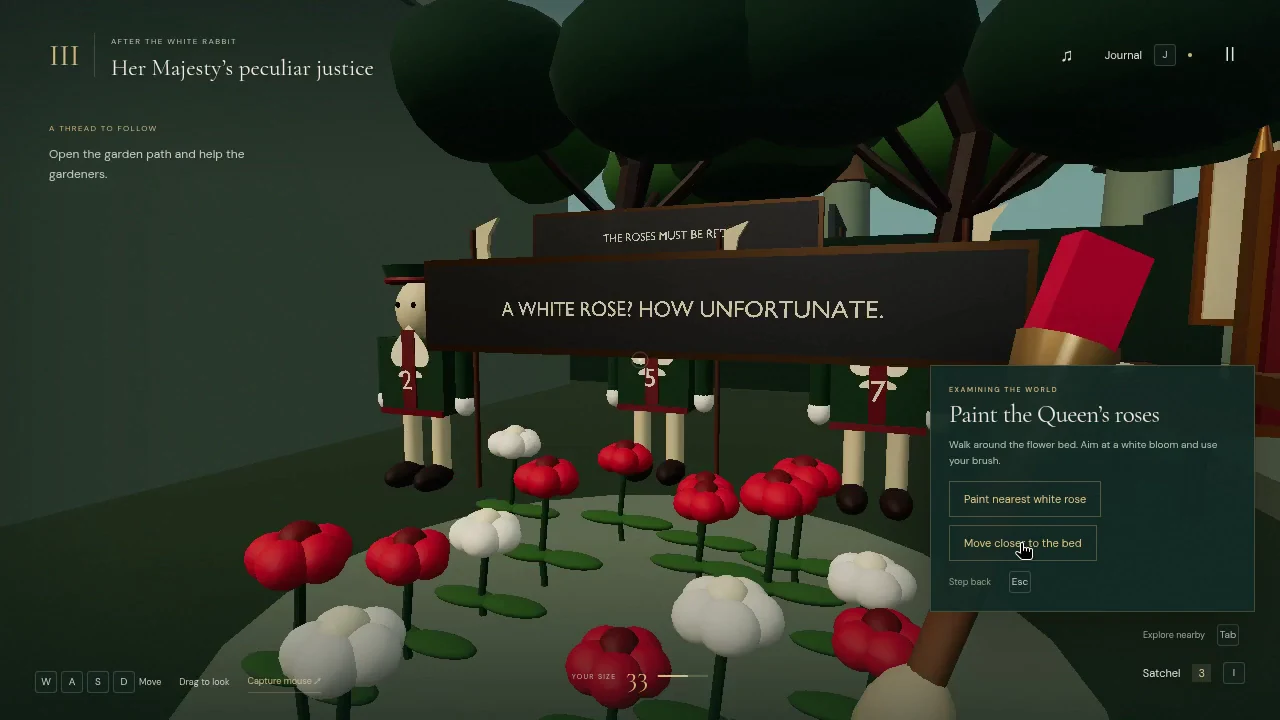
We turn the card-header trick into painting five roses. The story action fits the garden and gives the player a tool, but it changes the deduction substantially. This is an adaptation choice, not an equivalent mechanism.
20. The stolen tart
Our 3D adaptation
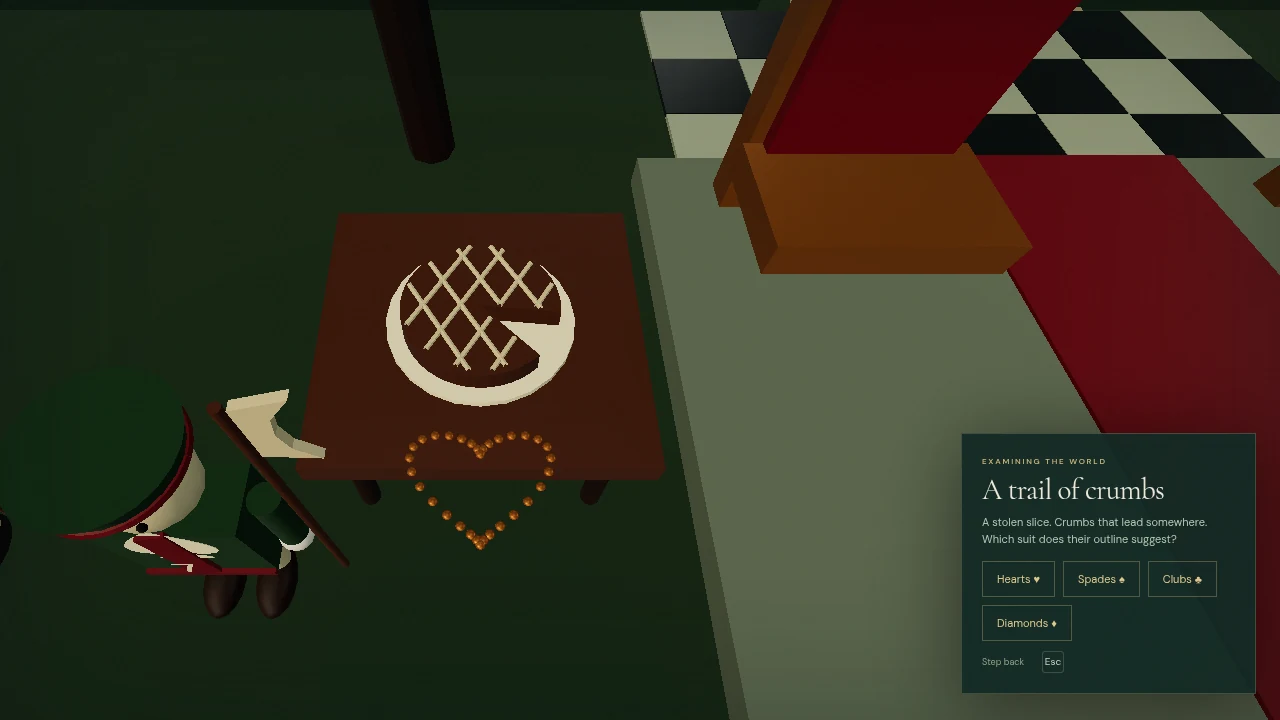
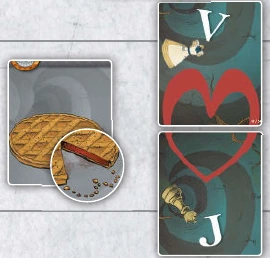
The missing pastry wedge and crumbs sit together in the world. We cut the slice from the actual model and moved crumbs out from under it. The player should be able to see the shape without guessing what the artist intended.
21. The guards' disguise
Original · PDF p. 6
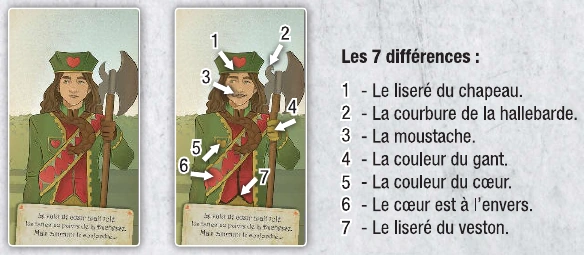
Find seven differences between guards.
Our 3D adaptation
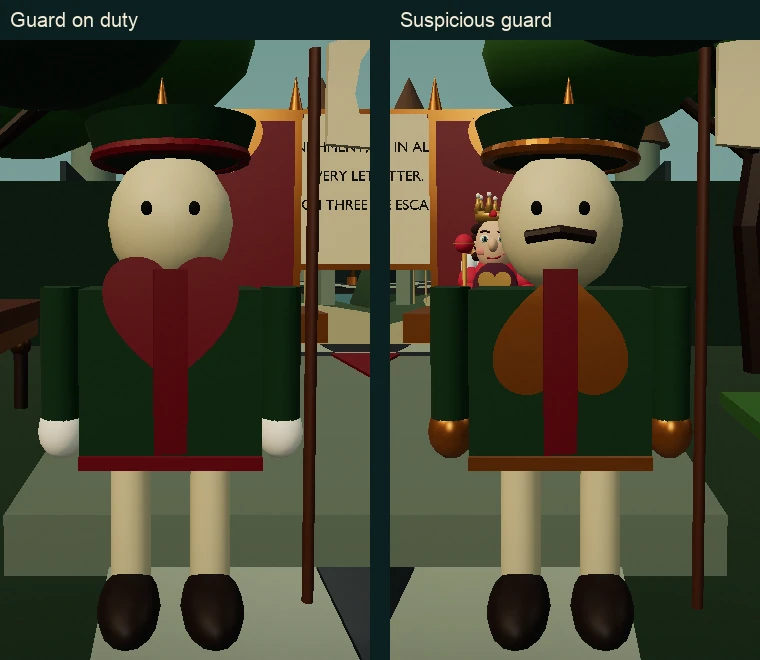
Two inspectable uniforms retain seven deliberate differences. We removed an accidental eighth change. This puzzle needs a controlled comparison more than character variety; even a decorative change can become false evidence.
22. The Queen's hearing
Original · PDF p. 6
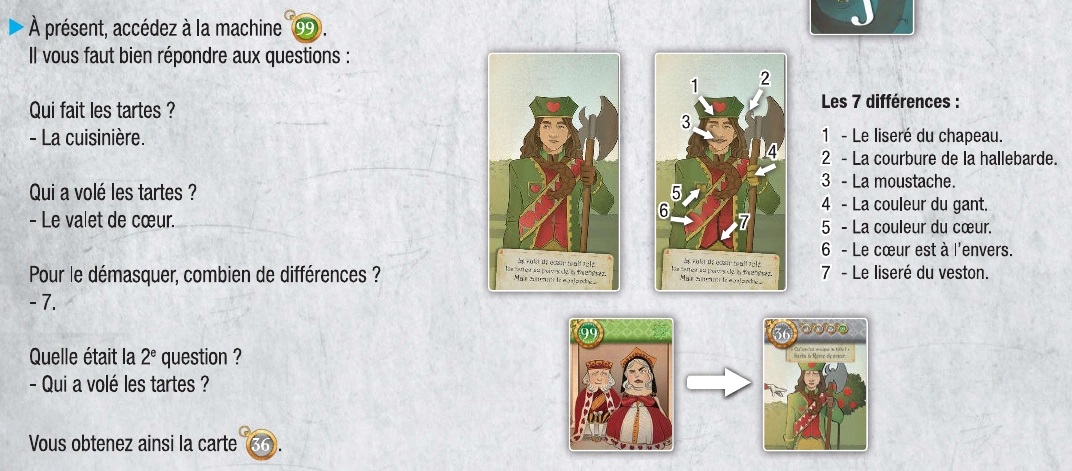
Answer questions; remember the second one.
Our 3D adaptation
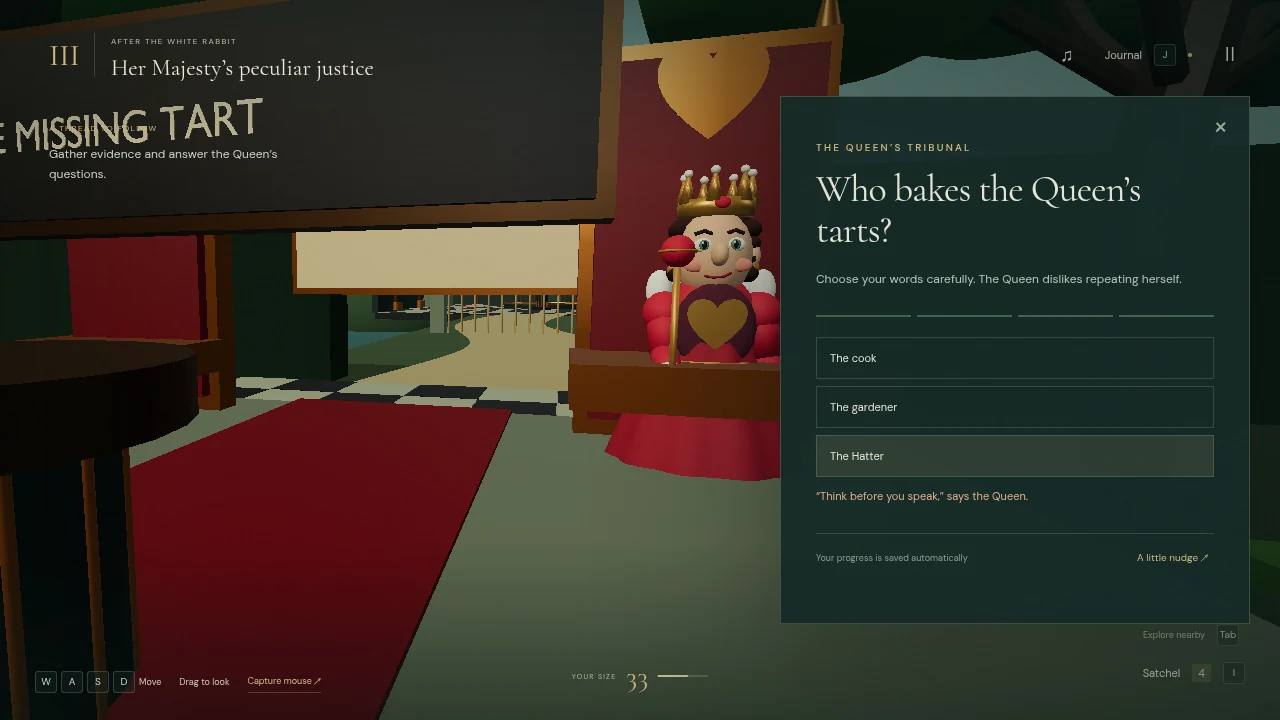
The hearing uses evidence gathered at the kitchen, tart and guards. The memory trick remains. The Queen's gestures add performance, while the response choices keep the questions usable on a phone.
23. Croquet
Our 3D adaptation
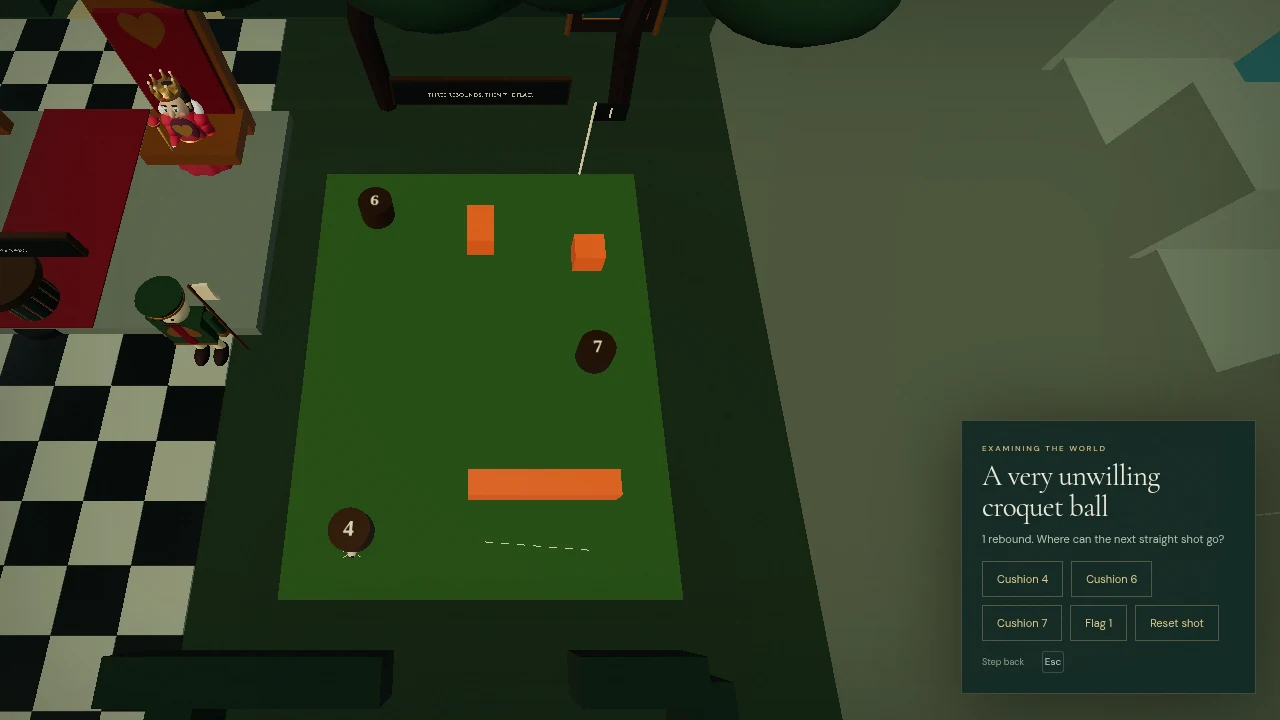
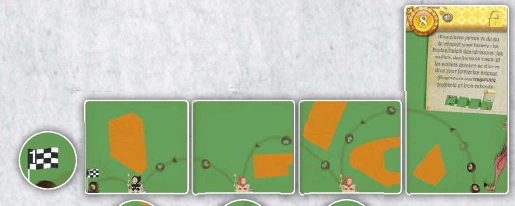
An animated hedgehog follows individual shots across a lawn. We test those segments against the visible obstacles. Earlier code accepted the intended answer while the hedgehog crossed a block, so we rebuilt the route and collision checks together.
24. The wooden witnesses
Original · PDF p. 7
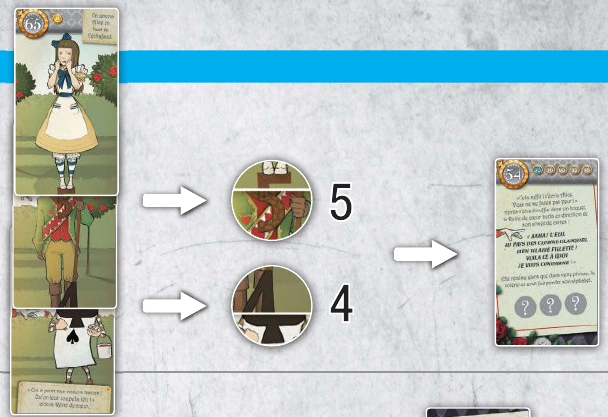
Overlap figures; remove their heads.
Our 3D adaptation
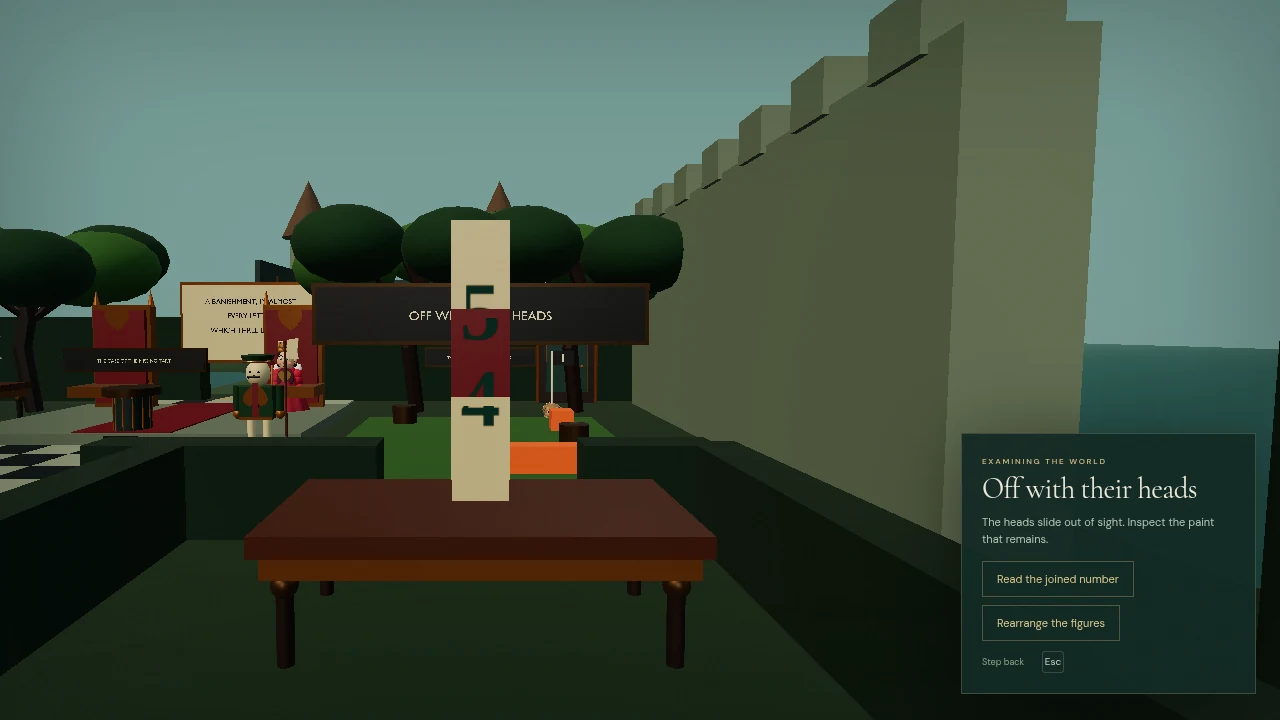
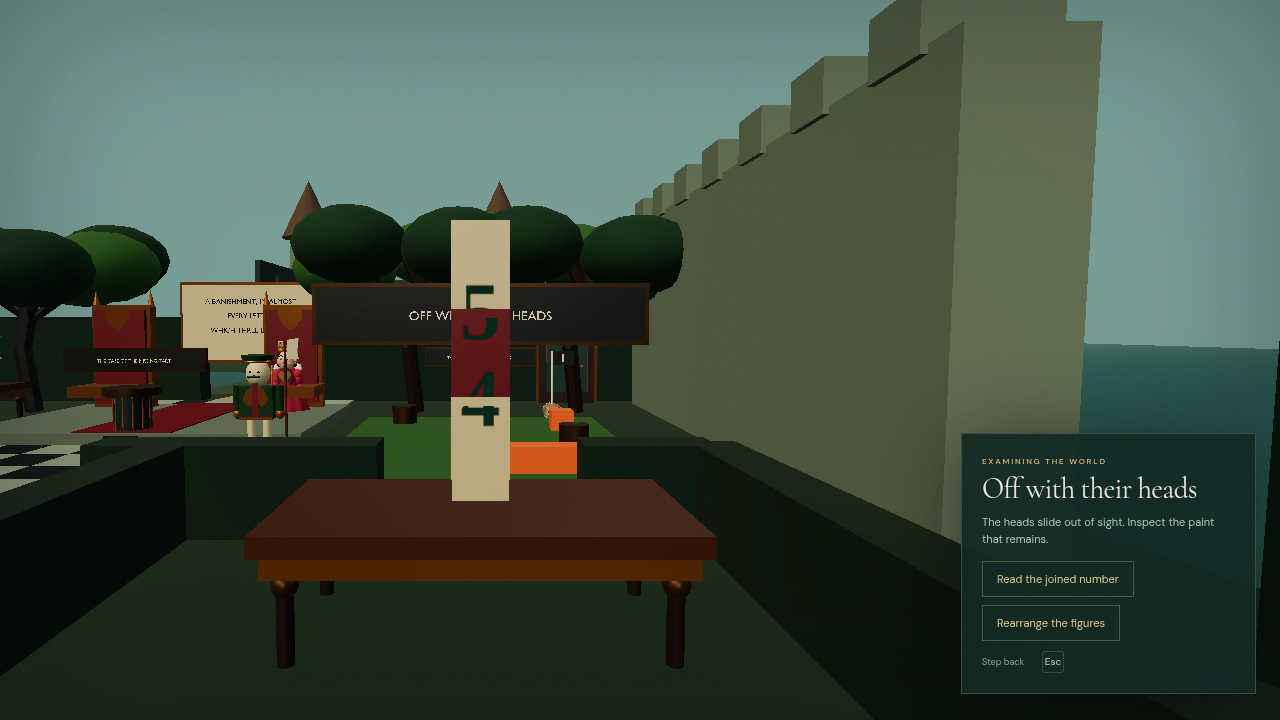
Three wooden rewards can be stacked, then their heads lowered. Their permanent paint joins into a number. We removed an unrelated number overlay so the answer comes from the objects the player rearranged.
25. The Queen's decree
Our 3D adaptation
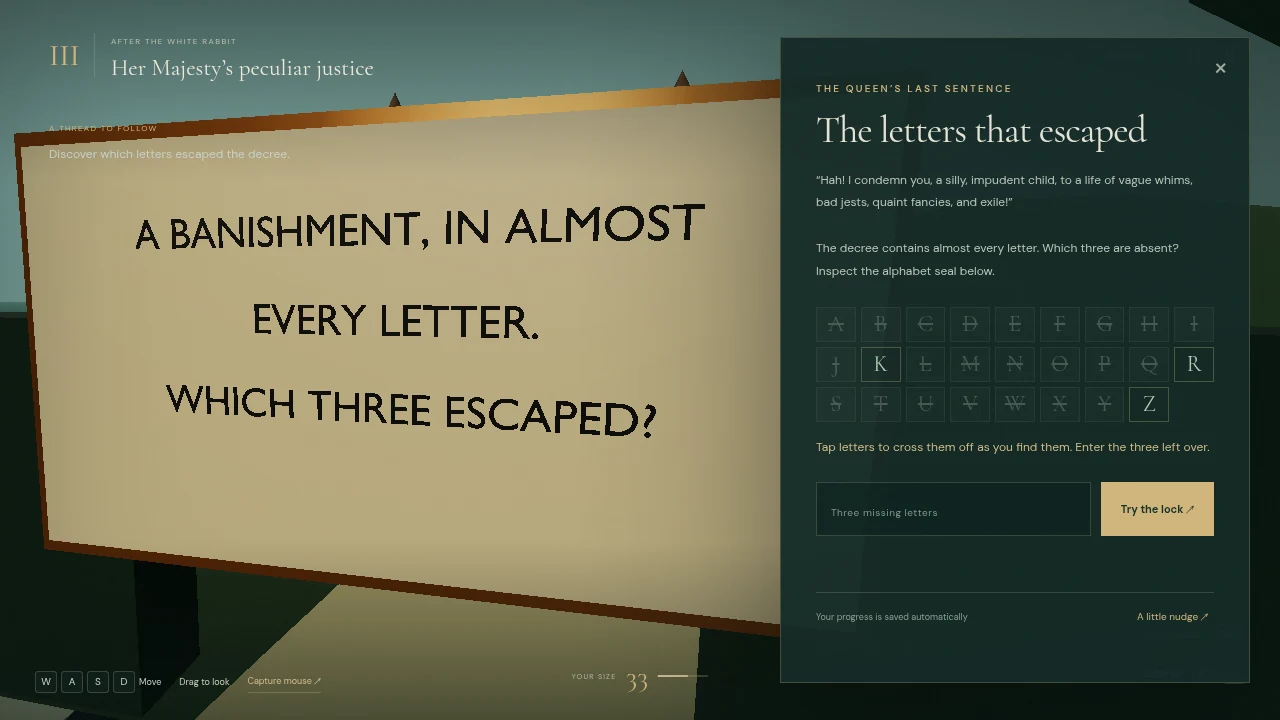
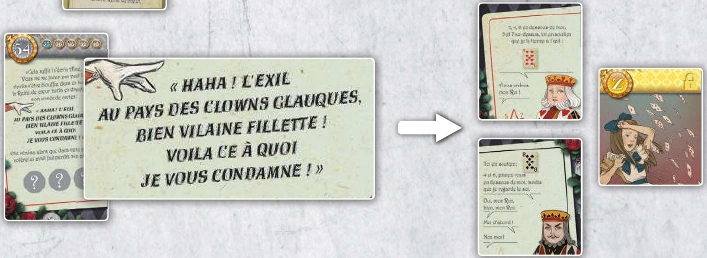
The English decree has the required missing letters and a letter-marking tool. This changes the writing while retaining the letter-coverage puzzle. A literal translation would not preserve the constraint.
26. The kings' construction
Original · PDF p. 7
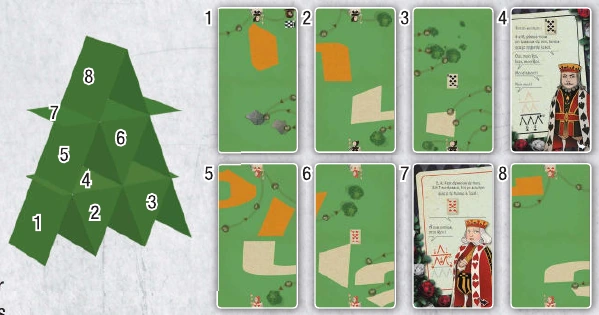
Fold and arrange the marked pieces.
Our 3D adaptation
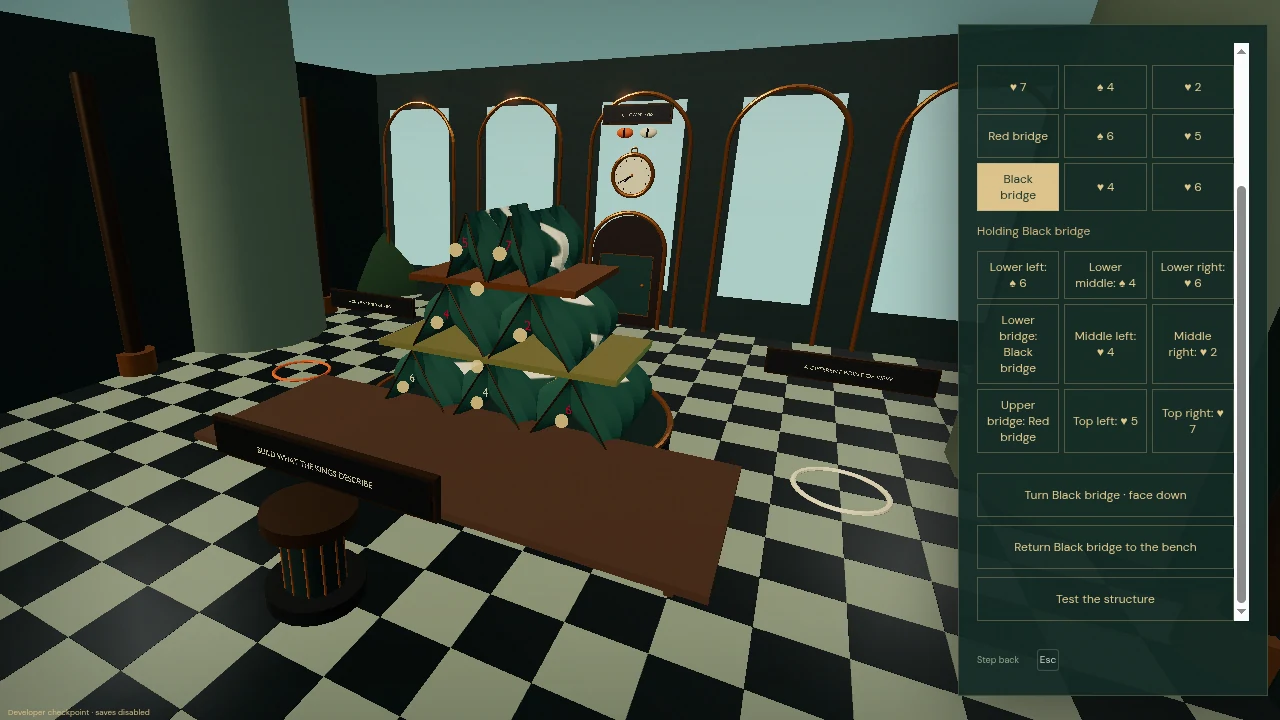
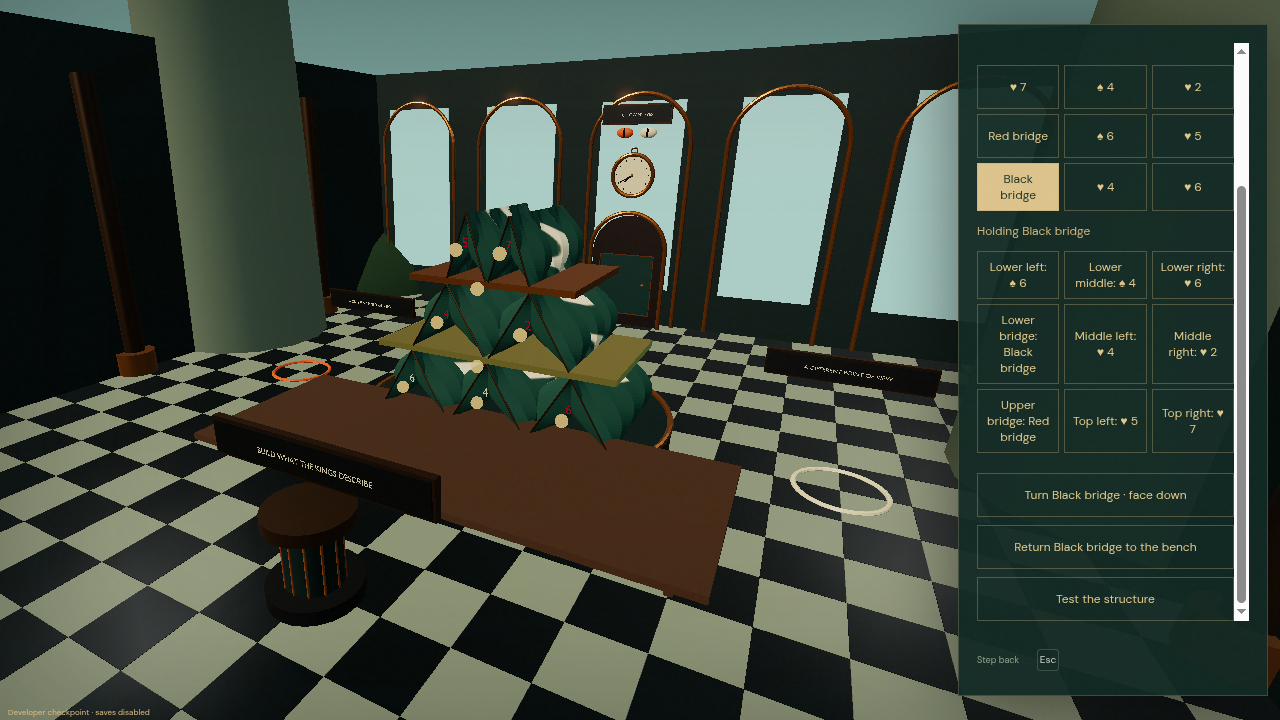
The rebuilt bench lets you select actual painted pieces and choose their sockets, in any order. Occupied slots can be swapped and pieces returned. The two engraved bridges turn over. This keeps a structured placement puzzle while replacing paper balancing with fixed supports.
27. Reading the finished house
Original · PDF p. 7
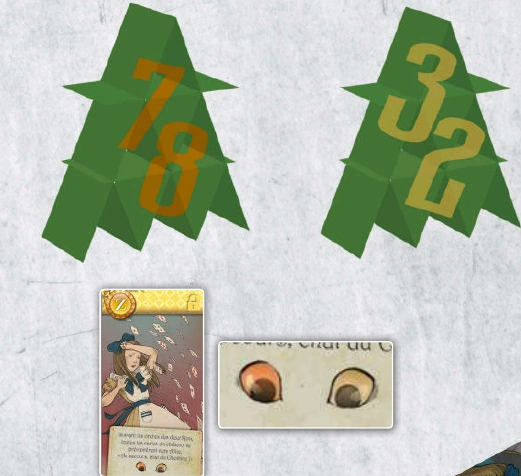
Align both sides; order by eye color.
Our 3D adaptation
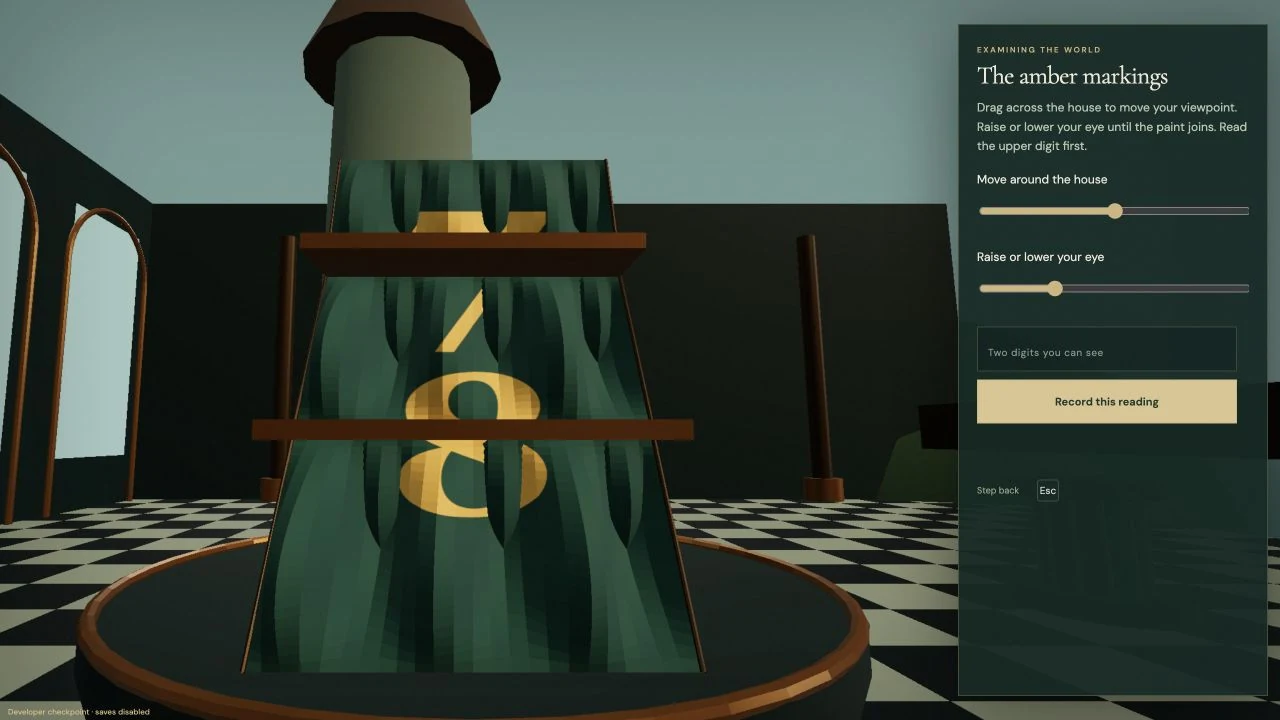
The old rings moved the camera to the answer and recorded it. The rebuild puts paint on the folded, ribbed surfaces themselves. You adjust your viewpoint and eye height, then enter your reading. The ribs make our architectural object differ from folded paper; they give its paint depth instead of a floating overlay.
§Getting the recording wrong, twice
The first short video was laggy. It came from a 15 FPS recording made in a software-rendered browser. Exporting it at 30 FPS repeated the existing frames, so the movement still looked choppy.
We recorded again in a native browser at 60 FPS. Resizing the browser panel changed the video's dimensions halfway through a take, so we fixed the capture at 1280 by 720 and let only the preview resize. That solved a recording problem. The next video still looked wrong.
§GPT-6 Astra could finish a recording and miss how bad the walking looked
I asked for something I could share. GPT-6 Astra used the Explore menu's assisted walking, then treated the frame-rate and playback checks as evidence that the video was ready. The camera kept zigzagging. I rejected it.
The route planner only moved between four grid neighbors, alternating short forward and sideways steps. The camera turned toward each step. The game already accepted W and D together, but the agent had chosen assisted travel for filming instead of holding both directions. It also failed to catch the result in its review. Smoothly playing a bad route was still a bad video.
We changed assisted walking to allow diagonals and join visible stretches into straight paths, while checking the route against obstacles. Turning also takes the shorter direction when an angle crosses the wraparound point.
For the replacement at the top of this post, the agent used visible local recording buttons that hold movement keys together through the game's normal input handlers. These are synthetic key events, not a human playthrough. The outdoor takes use those held keys; puzzle shots use the game's interaction controls. Chapter checkpoints set up each take. No camera positions were scripted during the walks.
The replacement keeps the original pace and game sound. We checked the actual movement as well as the video: both keys remain down throughout the diagonal, both position coordinates change together, and the camera holds its direction until the deliberate turn. The old clip stays here because it shows a failure that passing frame-rate checks did not catch.
§Full walkthrough
The 24-minute repair playthrough and every chapter's written solution are here on the same page. The recording documents that earlier repair pass.
§Earlier full repair playthrough
We started with a fresh save and played every puzzle through the ordinary controls. The run found more bugs, so we repaired them and resumed that saved game after rebuilding. This is an edited demonstration across that repair pass. The kitchen, Hatter and court entrance received further visual fixes after their first appearances in the video. This video predates the visual finale rebuild. Its last chapter shows the earlier interaction. The written steps below cover the current version of the finale.
The recording uses Low graphics and software rendering. It is not a phone performance test or a timed first attempt. The written steps below explain each deduction; read the chapter you need.
On a phone, play sideways. The left stick moves; the right pad turns the camera. Tap Interact to use the object in front of you, or Explore to choose something nearby. Run off switches to Run on for longer walks. In a puzzle, Look at the clue reveals the world and Back to the puzzle returns to the answer. The fan and paintbrush have a Hide instructions button so their panel can leave your view clear.
§Chapter I · Down the rabbit hole
§Put the story back together
Inspect the open book on the low table near the entrance. Use the arrows to put its ten memories in this order:
- By the river, you glance at your sister's book TWO times.
- A white rabbit interrupts the quiet afternoon.
- Nothing about a passing rabbit seems very strange.
- Until he cries, "ONE moment late! Oh, my ears!"
- He draws a little watch from his waistcoat.
- Its hands show THREE o'clock.
- You follow him through the brambles.
- He disappears into a hole beneath a tree.
- After FIVE metres, the tunnel drops straight down.
- You land beside a book. Your story is waiting inside.
Read the highlighted number words in that order and enter 2135.
§Turn the brass letter
Inspect the brass M and turn it a quarter turn with Turn left or Turn right. The sideways letter reads as a 3, and its shadow supplies another 3. Choose Read the lock and enter 33. Entering only 3 leaves out the shadow.
§Continue the cat's multiplication table
The blackboard reads 4 × 5 = 12, 4 × 6 = 13, then 4 × 7 = 14. Each step raises the second number and the result by one. Six more steps take the result from 14 to 20 and the second number from 7 to 13. Enter 13.
§Recover the missing letter
Look at the doors together. Their arrangement forms an A. Add it to the plaque's LICE and enter A at The incomplete name. The recovered instruction tells you that eating makes you grow and drinking makes you shrink.
§Reach the key and open door 6
- Inspect the cake, listed as The biscuit in Explore. Choose 55 to grow to the highest mark.
- Walk to the high table and collect the triangular key. Growing alone does not collect it.
- Find door 6, whose lock has a triangular opening. Inspect it and choose Turn the triangular key. The leaf swings open.
- Return to the blue bottle and choose 11 to shrink.
- Go back to door 6. Walk through the opening, or inspect it and choose Walk through door 6.
The key opens the lock; the bottle gives you enough clearance to pass through. Only size 11 fits this doorway. The cake can only raise your size and the bottle can only lower it. You can revisit both if you choose an intermediate mark by mistake.
§Find your missing measure
After you pass through the doorway, the full measure is 89 and the dial by your head is 12. Subtract 89 − 12 and enter 77. Close the puzzle and tilt the camera upward toward the ceiling opening. That takes you into the woods.
§Chapter II · An afternoon out of time
§The caterpillar and the mushroom
Keep the 3:10 appointment with the caterpillar. The smoke forms two pairs of stacked rings. Enter 88.
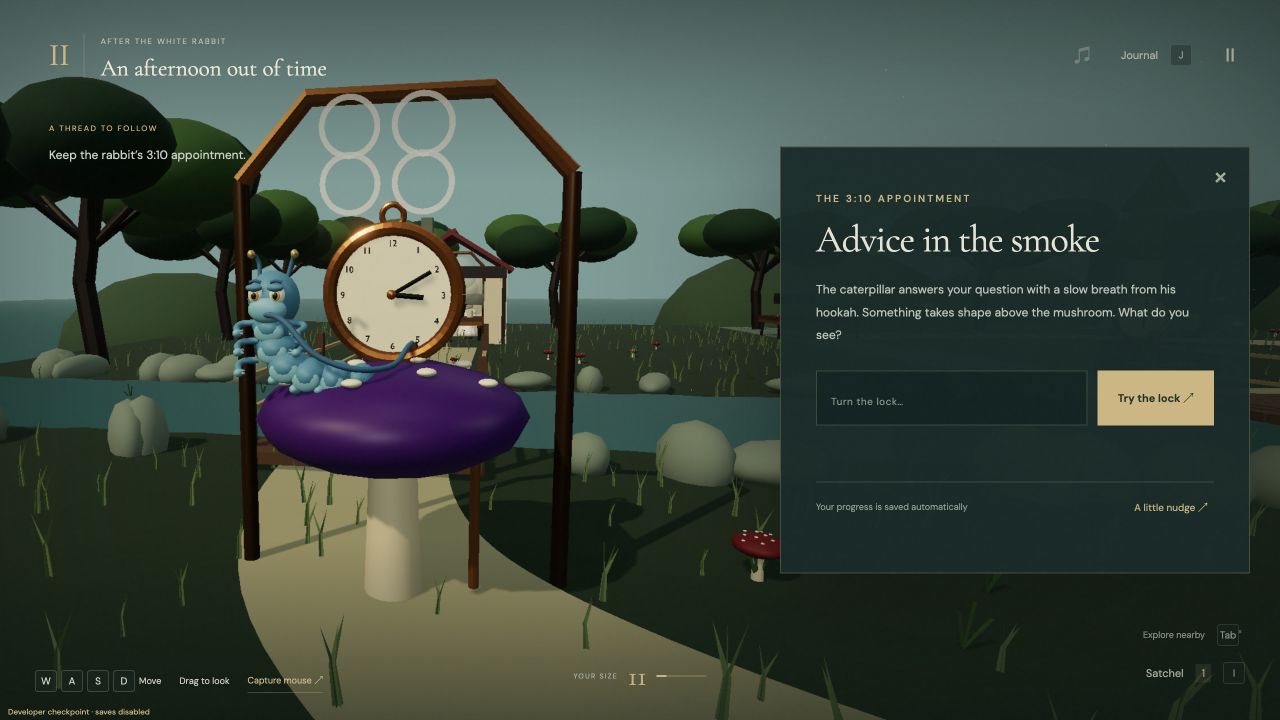
Follow his advice to the solitary violet mushroom among the roots west of his grove. Inspect it and choose Taste both sides of the mushroom. This restores your size to 33 and gives you the first message. You arrive in the woods small because this discovery completes the size puzzle.
§The messenger's invitation
At the 4:25 appointment, listen to the frog messenger or open Read the conversation. He repeats "won," which sounds like "one." Enter 1. Keep the message from his invitation.
§Clear the pepper kitchen
Find the blue silk fan near the ruins and the garden entrance. Approach it and inspect it to put it in your satchel. Cross to the pepper cottage for the 5:40 appointment.
With the fan collected, inspect the kitchen. Stand at the open front of the cottage, then press Sweep the fan three times. If you approach a side or back wall, the game walks you around to the entrance. On a phone, the right-hand Interact button also sweeps the fan. Hide instructions clears the middle of the screen while you work.
The smoke clears and the cook gives you the next message. Remember that the cook bakes the Queen's tarts. You will need that evidence later.
§Take tea with the Hatter
Go to the 6:00 appointment. The cup accepts one letter. Say "tea" aloud and enter T. The hat's 10/6 price tag is a distraction. Take the last message.
§Read the four clock hands
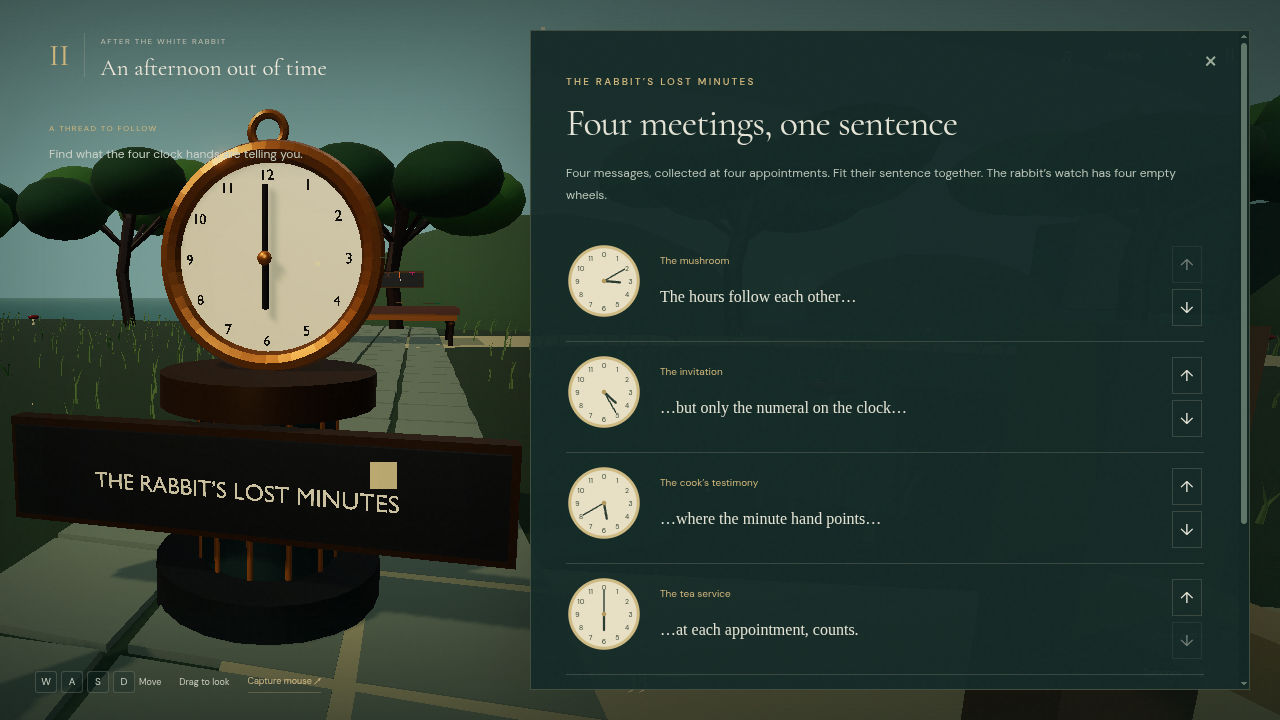
After all four meetings, inspect The rabbit's lost minutes. Arrange the messages as follows:
| Order | Message | Appointment | Long hand points to |
|---|---|---|---|
| 1 | The hours follow each other… | 3:10 | 2 |
| 2 | …but only the numeral on the clock… | 4:25 | 5 |
| 3 | …where the minute hand points… | 5:40 | 8 |
| 4 | …at each appointment, counts. | 6:00 | 0 |
The sentence tells you to read the numeral under the minute hand at each appointment. On these clocks the top mark is 0. Enter 2580.
§Trace the Cheshire crossing
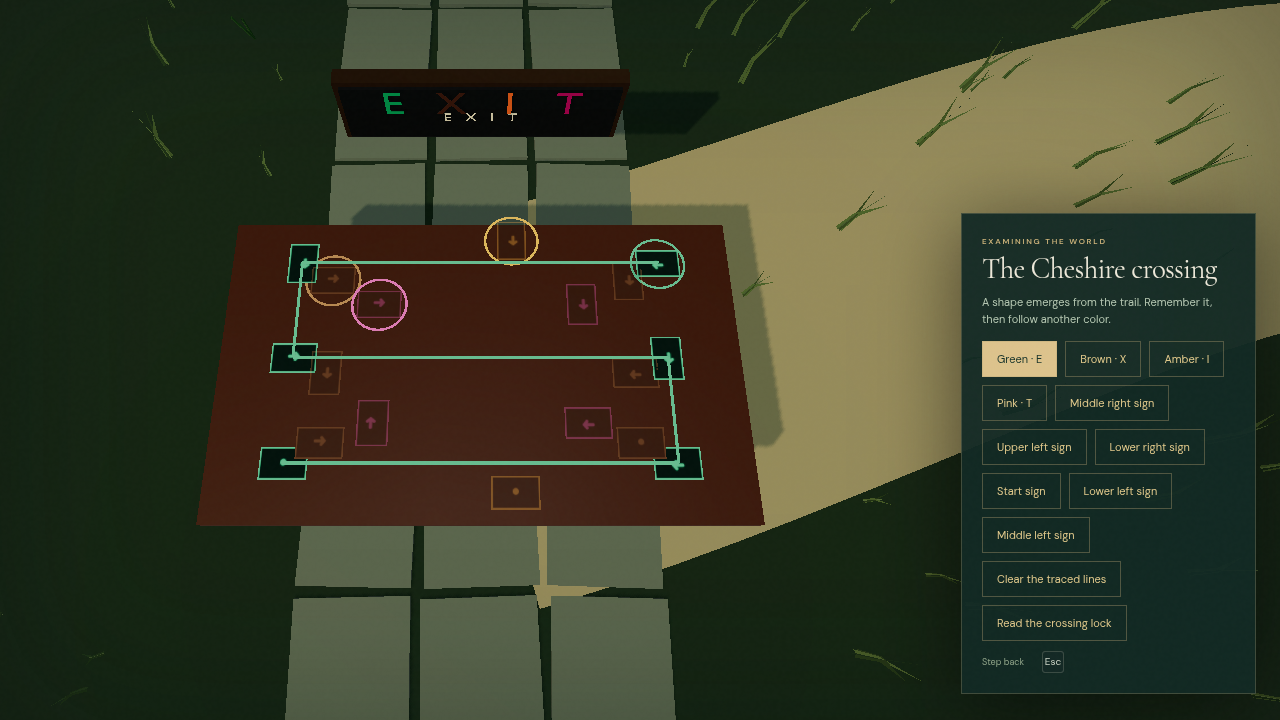
At the crossing, select one color and start at its ring. Follow the next arrow of that same color. You can click the signs in the world or use the position buttons in the panel.
The complete button routes are:
| Color | Route through its signs | Shape |
|---|---|---|
| Green · E | Start sign → Upper left → Middle left → Middle right → Lower right → Lower left | 5 |
| Brown · X | Start sign → Upper right → Middle right → Middle left → Lower left → Lower right | 2 |
| Amber · I | Start sign → Lower center | 1 |
| Pink · T | Start sign → Upper right → Lower right → Lower left → Start sign | 0 |
Pink returns to its starting ring to close the loop. Read the shapes in the colored E X I T order: green, brown, amber, pink. Choose Read the crossing lock and enter 5210.
The Queen's road is open. Follow the path east to her grounds.
§Chapter III · Her Majesty's peculiar justice
§Open the three hedge paths
Inspect The three hedge paths. Each gate applies its operation to your normal size, 33:
| Path | Calculation | Answer |
|---|---|---|
| Garden | 33 − 4 | 29 |
| Tribunal | 33 × 3 | 99 |
| Croquet | 33 + 16 | 49 |
Open all three paths. You can visit their activities in any order.
§Help the gardeners
Inspect the three gardeners and read their tunic numbers: 2, 5 and 7. Go to their tool chest, select spade seals ♠ 2, ♠ 5 and ♠ 7, then choose Open the tool chest. This collects the red paint and brush.
Return to the rose bed. Paint all five white blooms red. Walk around the bed as needed and use the brush on each white rose. Interact and Paint nearest white rose both work while the brush is equipped. The remaining count tells you how many are left.
The gardener gives you a wooden effigy when every white bloom is red.
§Examine the tart and both guards
On the tribunal path, inspect the tart. The missing slice and crumbs outline a heart. Choose Hearts ♥ to record the clue.
Compare Guard on duty with Suspicious guard. There are seven differences:
| Detail | Guard on duty | Suspicious guard |
|---|---|---|
| Hat band | Red | Gold |
| Halberd blade | Deeply notched edge | Straighter edge |
| Moustache | Absent | Present |
| Gloves | White | Gold |
| Heart emblem color | Red | Gold |
| Heart emblem direction | Upright | Inverted |
| Bottom jacket trim | Red | Gold |
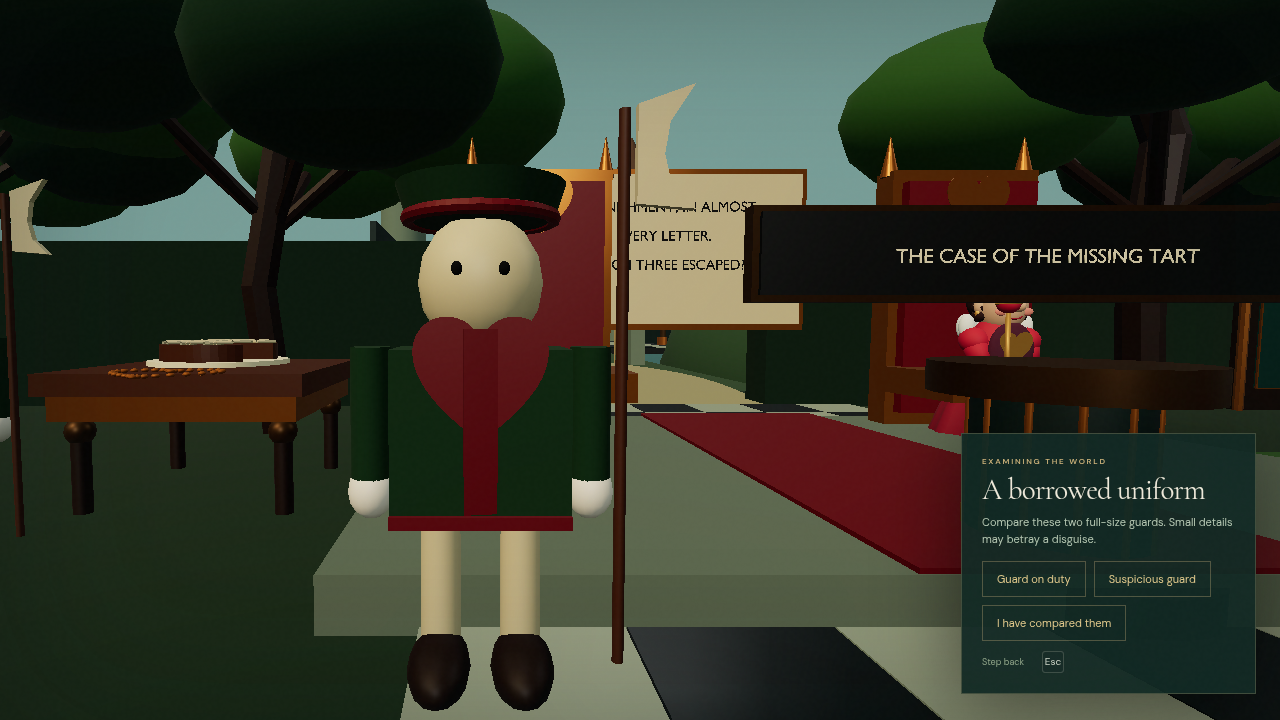
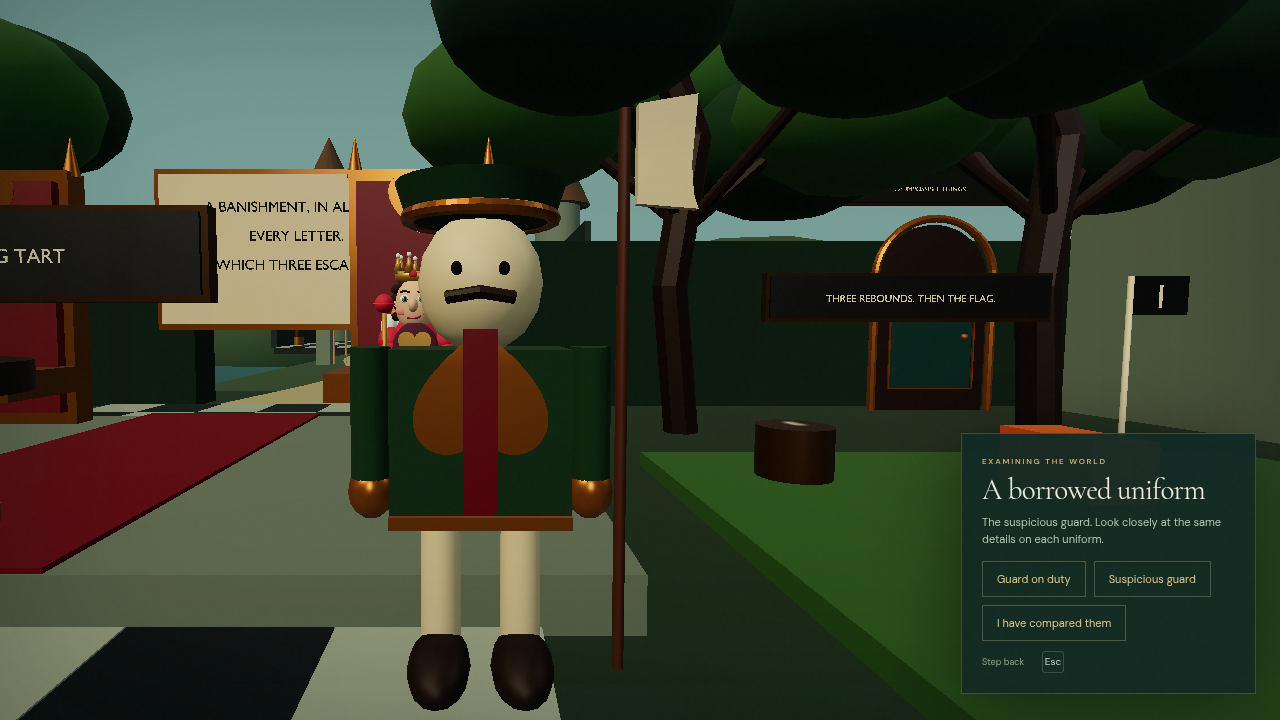
Choose I have compared them when you finish. The game needs both the tart observation and the uniform inspection before the hearing.
§Answer the Queen
Give these four answers in order:
- Who bakes the Queen's tarts? The cook.
- Who stole the tarts? The Knave of Hearts.
- How many differences expose the disguise? Seven.
- What was my second question? Who stole the tarts?
The last answer is the wording of her earlier question. The hearing gives you the knave's wooden effigy.
§Win at croquet
Inspect the croquet lawn. Choose Cushion 4, wait for the hedgehog to stop, then Cushion 7, Cushion 6, and finally Flag 1. The route is 4 → 7 → 6 → 1, or 4761.
Those straight shots avoid the orange obstacles and use exactly three rebounds. If you hit a block, start the sequence again. Choose Collect your prize after reaching the flag to receive your own wooden effigy.
§Join the three wooden figures
Bring all three rewards to The wooden witnesses. Stack the figures from top to bottom by selecting:
- You
- Knave
- Gardener
Choose Lower the heads. With the heads out of the way, the painted fragments join into 54. Choose Read the joined number and enter 54.
§Find the letters missing from the decree
Read the Queen's decree and mark each letter that appears. The three unused letters are R, K and Z. Enter RKZ. Their order does not matter.
The route behind the thrones opens. Follow it north to the impossible house.
§Chapter IV · The house of impossible things
§Build the kings' house
Inspect the kings' instructions. Select a piece from the physical bench or its button, then choose a socket on the model or its position button. You can build in any order. Place the pieces as follows:
| Position | Piece |
|---|---|
| Lower left | ♠ 6 |
| Lower middle | ♠ 4 |
| Lower right | ♥ 6 |
| Lower bridge | Black bridge, face down |
| Middle left | ♥ 4 |
| Middle right | ♥ 2 |
| Upper bridge | Red bridge, face down |
| Top left | ♥ 5 |
| Top right | ♥ 7 |
Select each bridge and turn it until its engraved face points down. Selecting a placed piece and choosing an occupied socket swaps the two pieces. Return a selected piece to the bench if needed. Choose Test the structure when the arrangement is ready.
§Find the two viewing angles
Approach the amber floor mark and inspect that side. The camera begins away from the aligned view. Drag across the visible house, or use Move around the house and Raise or lower your eye. Bring the horizontal control near its middle, then lower your eye until the colored strokes join across the folded surfaces.
Read the upper digit before the lower digit. The amber side reads 78. Enter it and choose Record this reading. Merely opening this view does not record an answer.
Repeat from the ivory side. Its upper and lower digits read 32. Record 32.
The cat's left eye is amber. Use that color's reading first. Go to The way home and enter 7832 to finish.
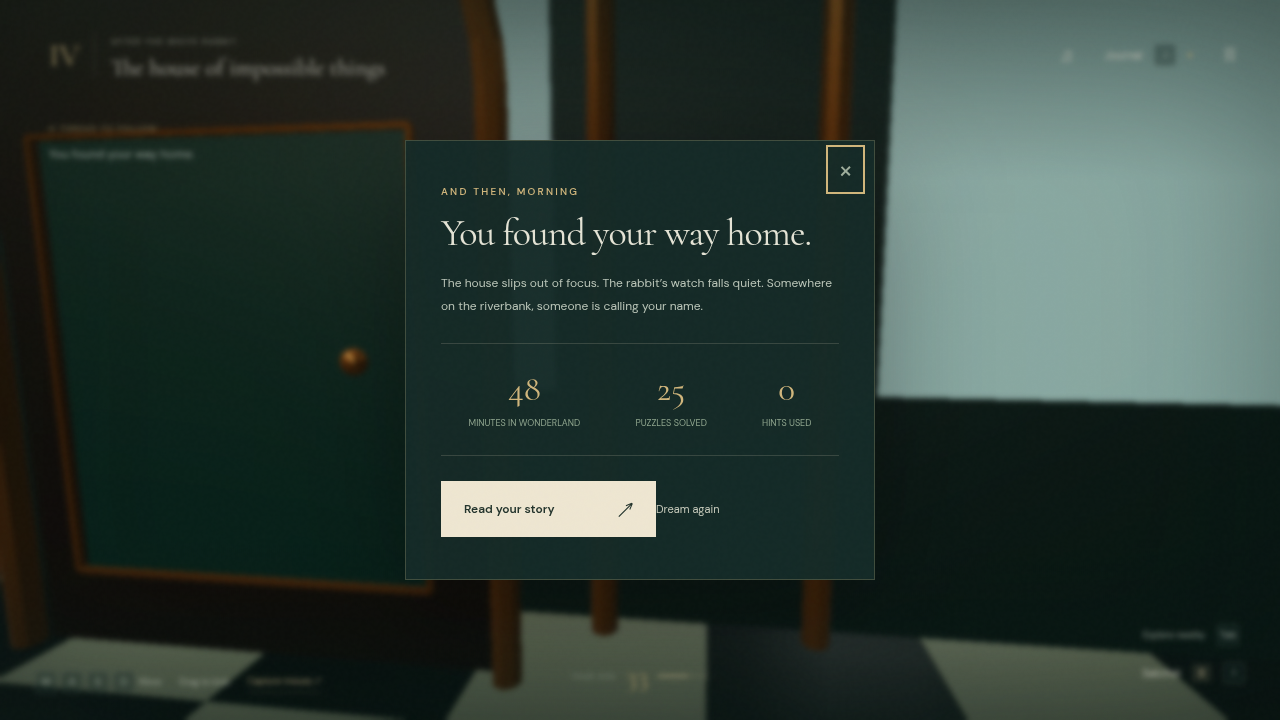
The recorded ending shows 25 puzzles solved. Its in-game minutes are not a wall-clock benchmark.
Comments
Sign in with GitHub and say something. Threads live in this repository's Discussions, so you keep your words and I keep no database.